The first thing that a Steldene cook would probably say about this dish is that there’s no steak in it.
This statement could be read at first glimpse as simple provocation—with the suggestion that a local food fan was out to score points against the reputation of whatever hostelry was involved for billing the contents of the pie as better-quality meat than they really are. But it’s more likely that the staff in the tavern in question (the Crow and Cheese in Havering Slides, by all accounts a perfectly reputable place) was, when describing the dish to customers like Herewiss, simply splitting the difference between the rather different Darthene and Steldene regional names for a given cut of meat.
If a native Darthene-speaker like the protagonist of The Door Into Fire misidentified the meat in a pie as “steak” when he saw someone else in the tavern eating it with gusto, that’s at least partly a cultural issue rather than a semantic or culinary one. The Brightwood region proper doesn’t farm a lot of beef—so even a prince-elect could be forgiven for not immediately picking up the implications of the dish’s presentation as a pie as an indicator of what cut of meat was being used. Anyway, Dusty had the potential rescue of another prince distracting him right then… so we can perhaps let him off the hook.
In this case, what matters is that the meat is beef, and very good beef at that. The border country between Darthen and Steldin is renowned for the quality of the cattle and grain farmed there—a fact which has occasionally been the cause of the tension that from time to time breaks the surface between the two easternmost Realms. The cattle in particular are worthy of note: a hardy, self-reliant, dun-colored beef-and-dairy cross recalling the Brown Swiss, or the Red Poll variety still being raised in our Earth’s southern English regions. The barley that appears in the basic stew is also a regional staple—the local cognate to Earth’s “heirloom” black barley, Hordeum vulgare v. nigricans (a.k.a Hordeum distichon v. nigricans)*.
The beef in this pie is shin beef—in the Kingdoms’ universe, as in ours, a relatively inexpensive and flavorful cut. This flavor is if anything improved by the long, slow cooking required for shin, which renders it tender enough to eat and releases the richness of the meat’s tougher connective tissue into the finished dish. The pie’s Steldene spicing, leaning (as it so often does) toward the hot end of the spectrum, is here augmented by various sweet notes, both from the vegetables and the typical addition of chiles and fruit.
This recipe adds hot and sweet pickled oranges, a locally favored tracklement… but a few orange slices and some ground zest would be seen as an equally valid addition if the cook hadn’t had a chance to pick up some of the preserve at the local market. (Or if the market was in a different universe.) The final bittersweet “bass note” comes from the stew’s overnight cooking in Steldene black beer. Best of the local beers for this purpose is the “smoked” black beer that comes of aggressively toasting the sprouted barley in the post-malting stages of the brewing process.
This dish’s tavern-friendly presentation as a pie is the local manifestation of a Realms-wide strategy for repurposing (or stretching) anything stewed. It’s also a timesaver for the busy taverner, as making individual baked-in-crust meat pies is a labor-intensive business. In terms of kitchen prep, it makes far more sense to have the filling pre-cooked and ready to go. Then, when the customer turns up wanting a pie, the only thing that needs to be made to order is the crust. (And maybe only the top crust, at that. This can be baked on top of the individual pie dish containing an already-made bottom crust, while the just-added filling underneath it is heating through.)
See the Recipe tab above for the details.
*Sometimes also known as “purple hull-less barley” or “Ethiopian barley”, this is one of very few grains that lacks an inedible hull, and can go from field to plate without significant processing.
The recipe and method:
This dish splits into two broad phases—cooking and refining the filling, and (close to serving time) making the pastry that will be filled. The filling alone will require an overnight (or day-long) cooking period: so lay your serving plans accordingly.
The filling ingredients
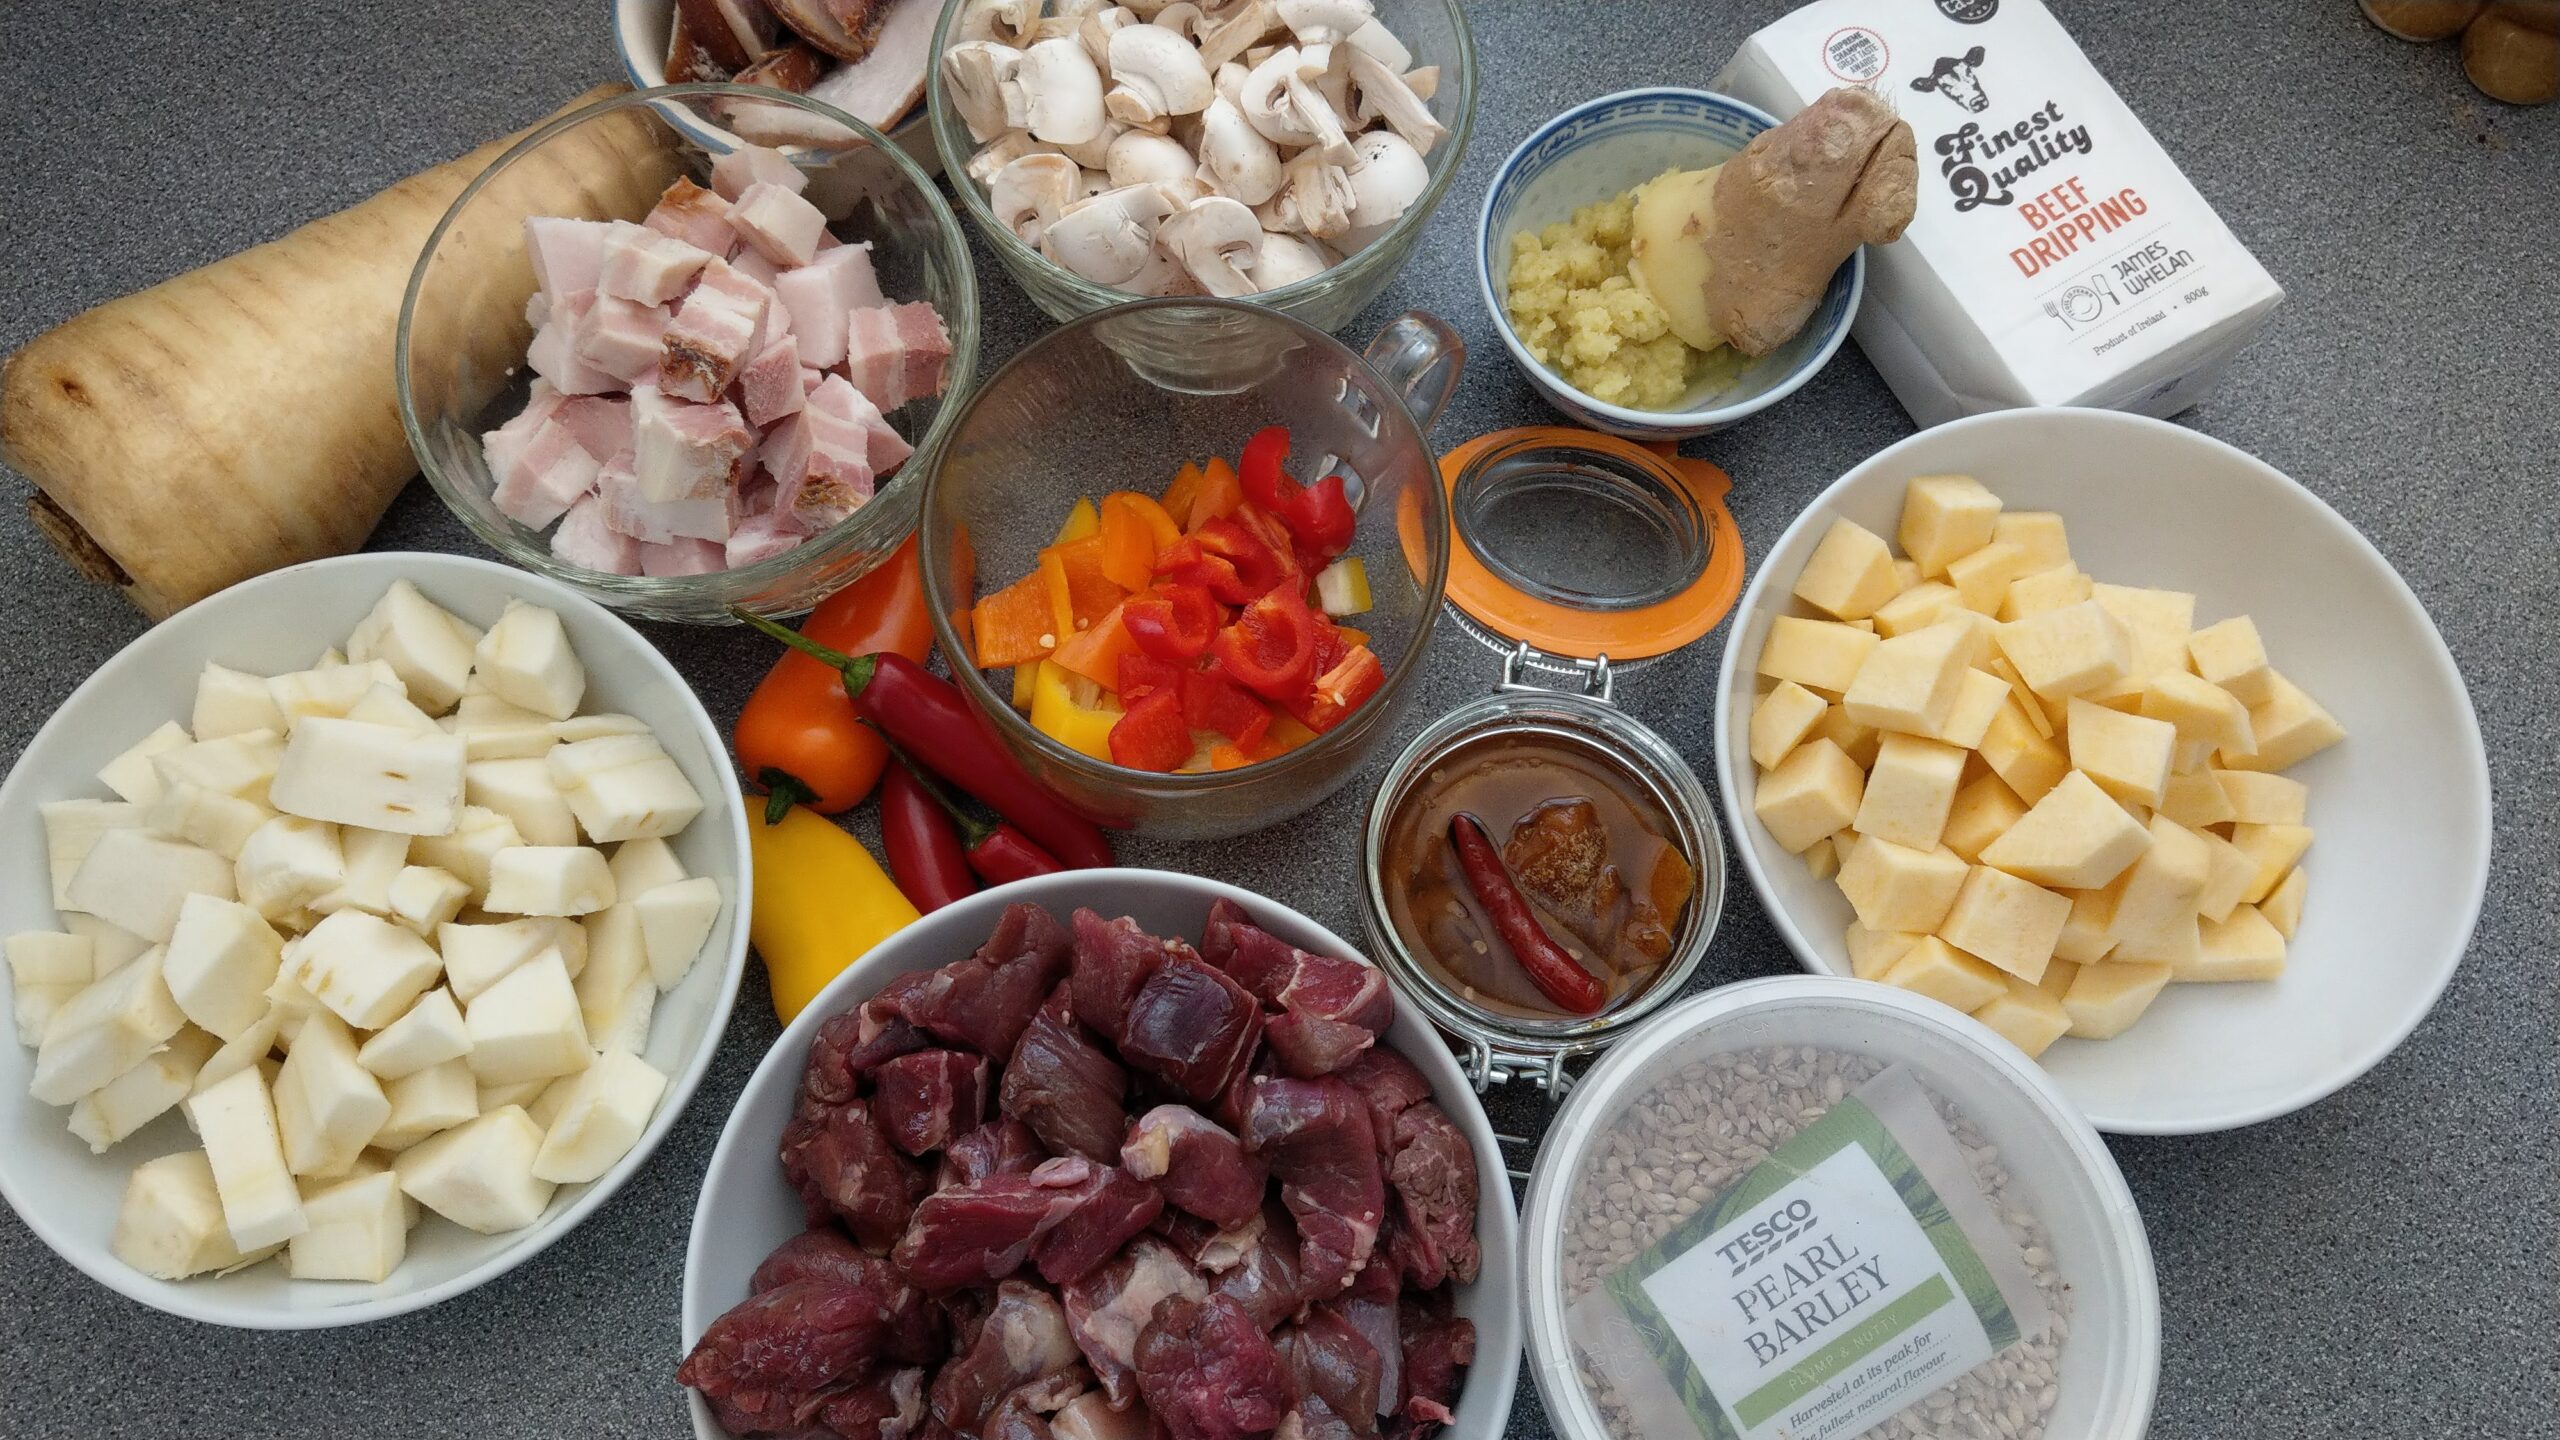
Taking these clockwise, from left to right:
- •300g chopped parsnip(s), peeled and chopped
- •250g chopped pork belly, the rinds trimmed off (The rinds will go whole into the stew to enrich its flavor and texture)
- •200g small or baby mushrooms, quartered
- •150g grated fresh ginger
- •20-30g of beef dripping for sautéeing the beef
- •A small turnip (about 300g), peeled and chopped
- •120g of pearl barley
- •1kg of shin beef or similar “stewing” beef
- •100g of small mild chiles
- •100g of sharper chiles (Cayenne or similar)
Not shown above:
- •1 small onion (optional)
- •2 cloves garlic (optional)
- •The zest of a small bitter orange (or any regular orange will do just fine). You could optionally also add the orange’s juice to the stewing stock.
- •500ml to 1 liter of a good local black beer
- •Salt and pepper to taste (and if you’re using a pre-salted bacon or pork belly in this, don’t overdo the addition of further salt. Wait until you’ve tasted the stock after cooking to add more if necessary)
- •Approximately 20-30 ml of vegetable oil for sautéeing all the main ingredients
Notes on the above:
Regarding the parsnips: If you’re not a fan of these, or can’t find them, feel free to substitute potatoes. Go for waxy “salad” types that will stand up to the cooking process without disintegrating; and saute them after you’ve cubed them.
Beef dripping: This can be problematic to find in some areas. If you’re a lard fan, substitute that by all means. Otherwise, your preferred vegetable shortenings/oil will do perfectly well for the purpose of searing the beef.
Regarding the vegetable oil: You could absolutely use olive oil in this if you like, as it’s native to the Kingdoms and grown widely in a number of varieties.
About the turnip: per the discussion at the bottom of the background tab in this article, make sure you’re getting a turnip and not a rutabaga, which won’t cook up nearly as well. Some grocers get a little confused (or easygoing) and wind up mislabeling rutabagas as turnips.
Black beers: Guinness will work very nicely in this. So will lighter “very-dark” beers. If by chance you have access to Schlenkerla Rauchbier, that will produce a very high quality stew indeed, and very close to the local south Darthene/north Steldene result, which calls for a similar smoked beer when it’s locally available. (There’s a brewery famous for this in Madeil.)
Additional seasonings: Ground long pepper and coarse-ground allspice are also nice additions to this.
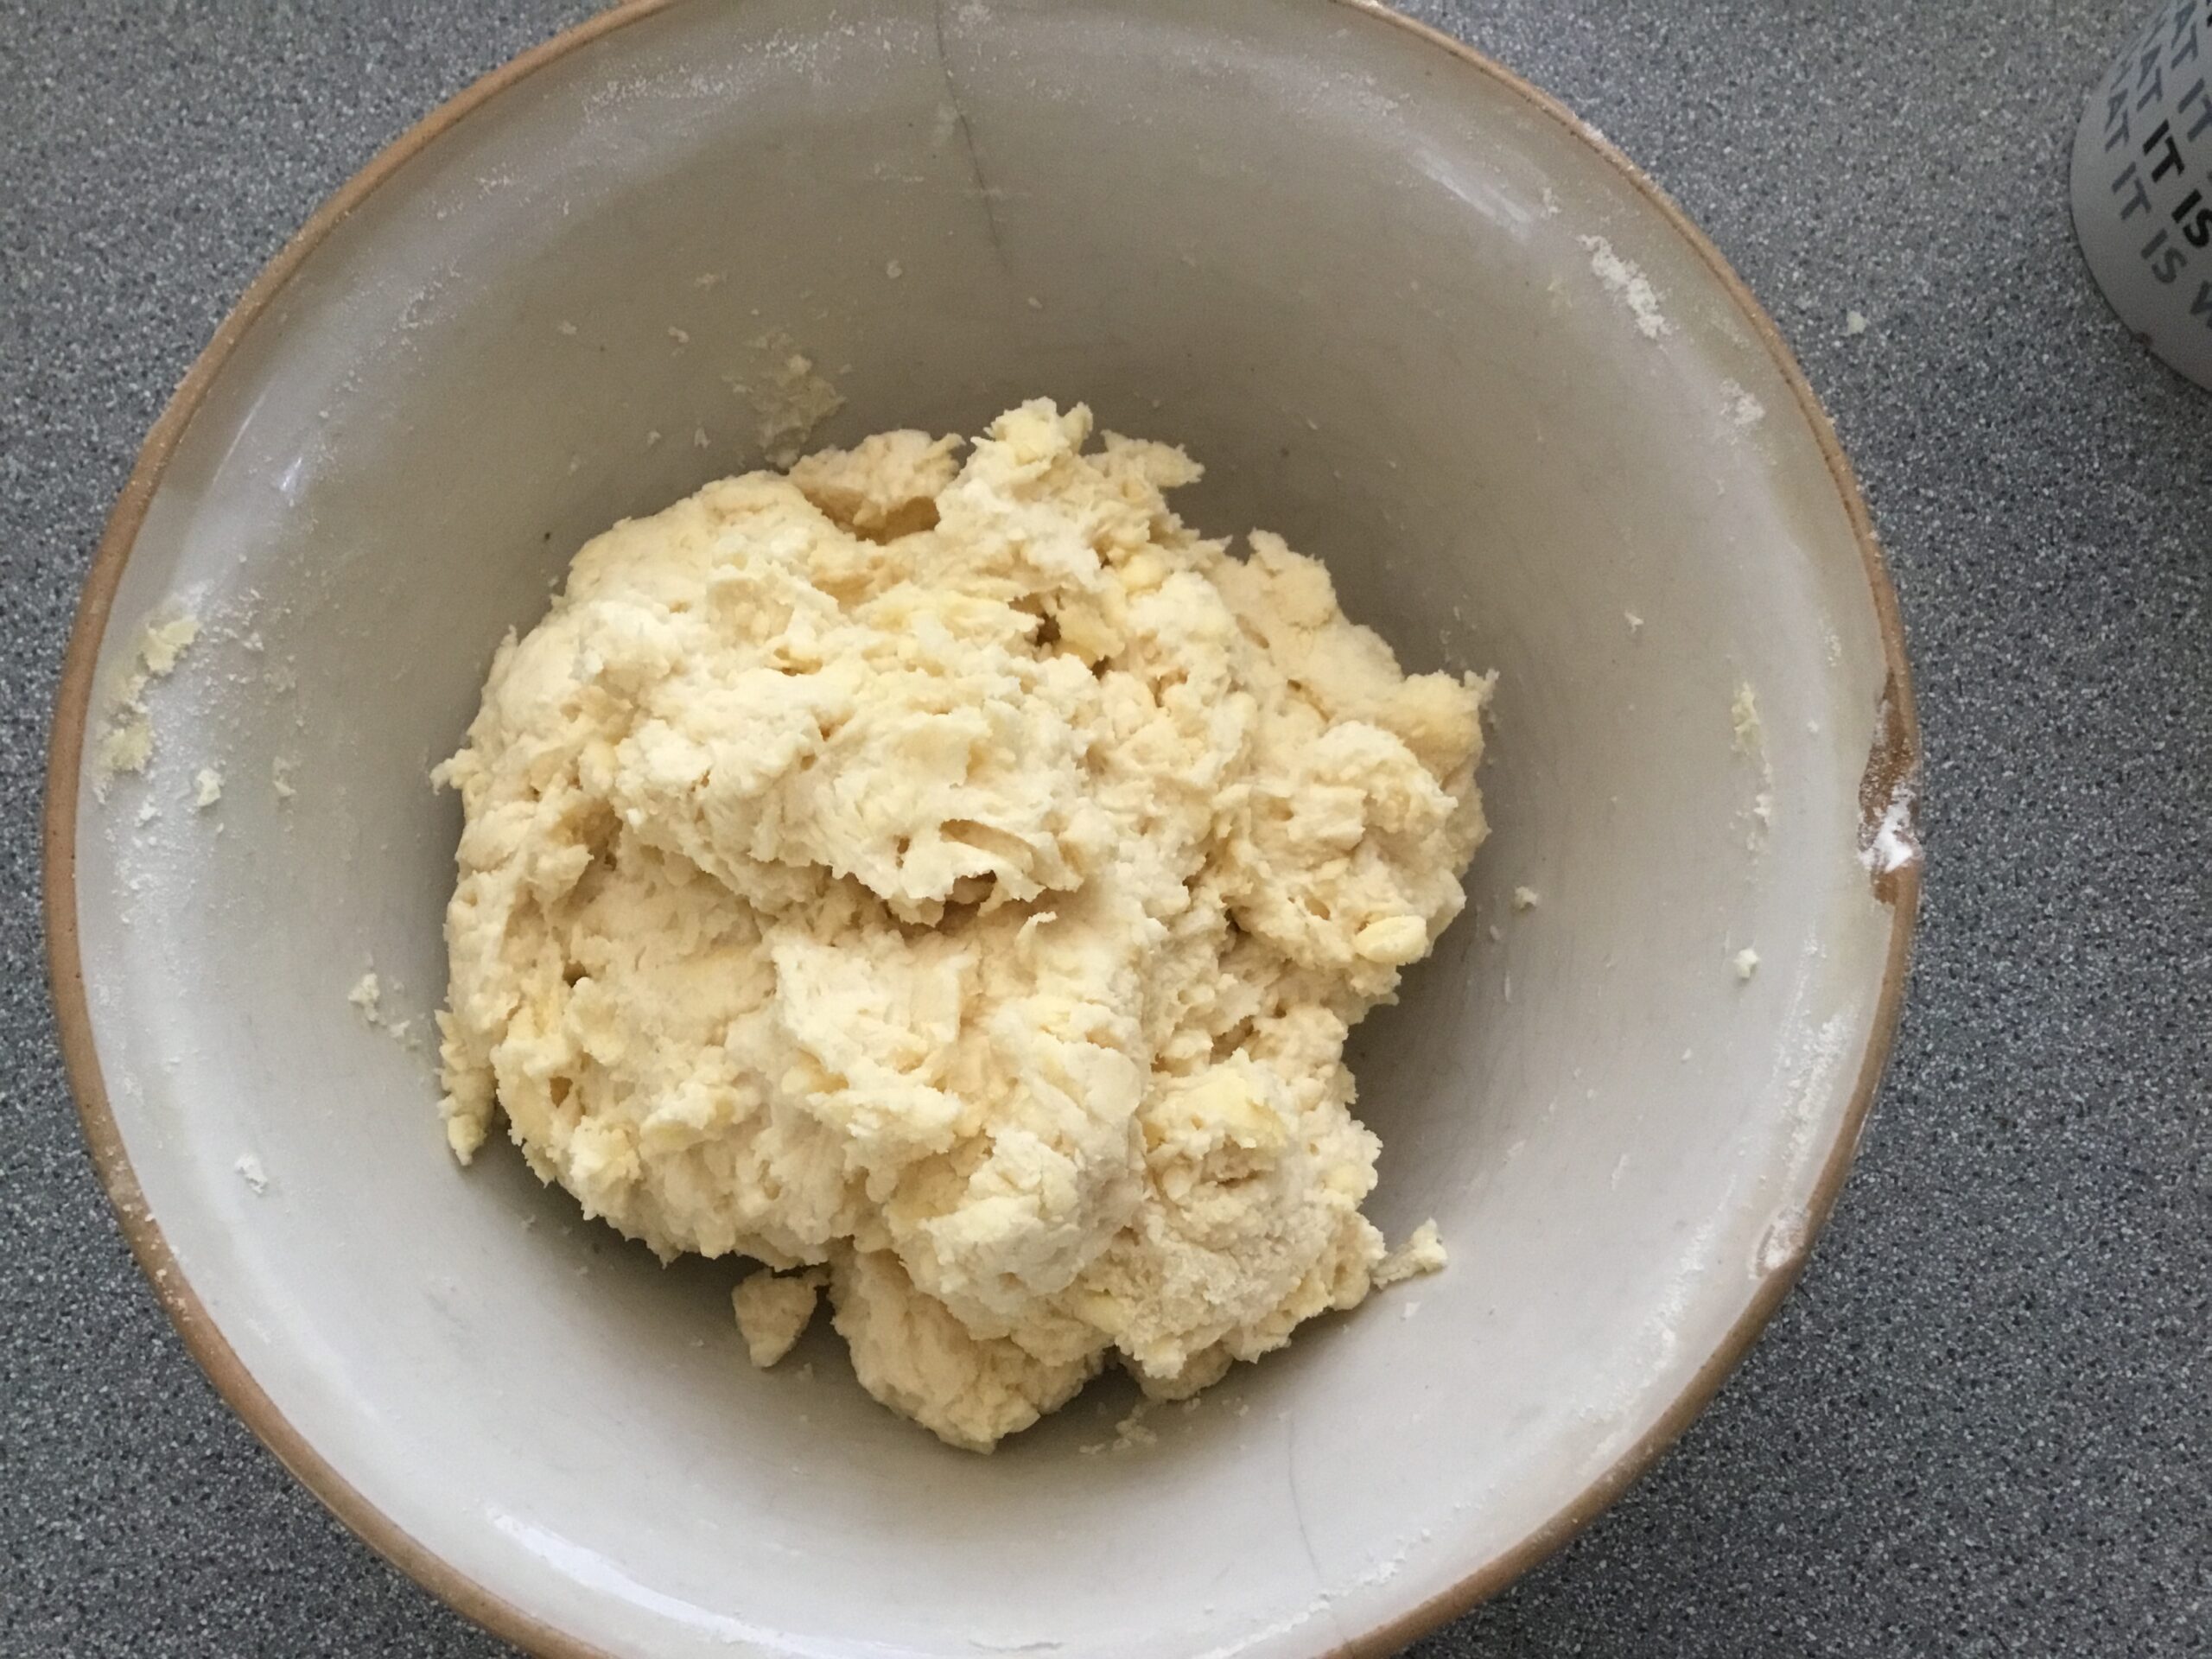
Assembling the filling part of the dish:
While there are a lot of ingredients to deal with, there’s no need for this process to happen in any particular order. Take your time.
Do your peeling and chopping first.
Then, once all the vegetables and meat ingredients are ready to deal with, start sautéeing each one separately from the others. There’s no reason not to do all this in the same pot, and (as you finish frying each ingredient) put it back in whatever dish you had it in to start with.
Sauté the beef last, and leave it in the pot you’re going to do your cooking in. This pot should be big enough to hold all the ingredients as well as an added 1000ml of liquid. (We used the biggest of our cast-iron Le Cousances pots, which officially holds 5 liters, though it’s pretty full at four.)
Everything gets briefly fried during this process—not only to “wake up” each ingredient’s flavors but to help seal their outsides so they’ll be less inclined to go to pieces (or mush…) during the long slow-cooking process. The goal here is to just slightly cook and seal everything: so no more than 5 minutes per ingredient should be required.
(A note about the barley: watch this closely as you sauté it with a spoonful of your chosen frying oil or fat, as it will inevitably try to burn… and the line between being “fried very dark” and “scorched” can be very thin indeed.)
Once all the ingredients have been pre-fried, add them to the beef in the big cooking pot, and mix well until everything is combined. Then raise the heat under the pot. You might like to add a little water at this point to help wash the barley down into the stew, to make sure it gets down where it’ll be able to absorb the stew’s liquid.
Then when the contents come to the boil,. add the beer and bring back to the boil again. (It’ll get pretty actively bubbly in there as the beer comes up to temperature.)
Once it hits a full hard boil, hold it there for ten minutes or so before reducing it to a lower boil.
Now comes the slow-cooking stage of the operation.
Cooking the filling
Many people will prefer to cook this dish in the oven. After twenty minutes to half an hour, you can remove the pot from the burner and put it into a low oven (150º C / 300º F) for at least 2 hours. At that point, remove it and test the meat for doneness and tenderness. If it’s not tender enough for you yet, put the pot back in the oven and give it another hour.
Keep doing this until the meat’s to your liking. Then leave it out of the oven and let it cool a little while preparing for the next step.
If you’re interested in trying the older-fashioned technique of “hay box cooking”—now having a renaissance because of its very low energy footprint—please see the tab above for more info, including an example of how to make your own slow-cooking box out of readily available household materials.
When the cooking’s finished
Remove the pot from the oven or hay box, and use a slotted spoon to separate the meat and vegetables from the stock. Taste the stock to see what seasonings it might still require. (It may particularly need salt, depending on how much salt the pork belly, or other pork, added to the dish.
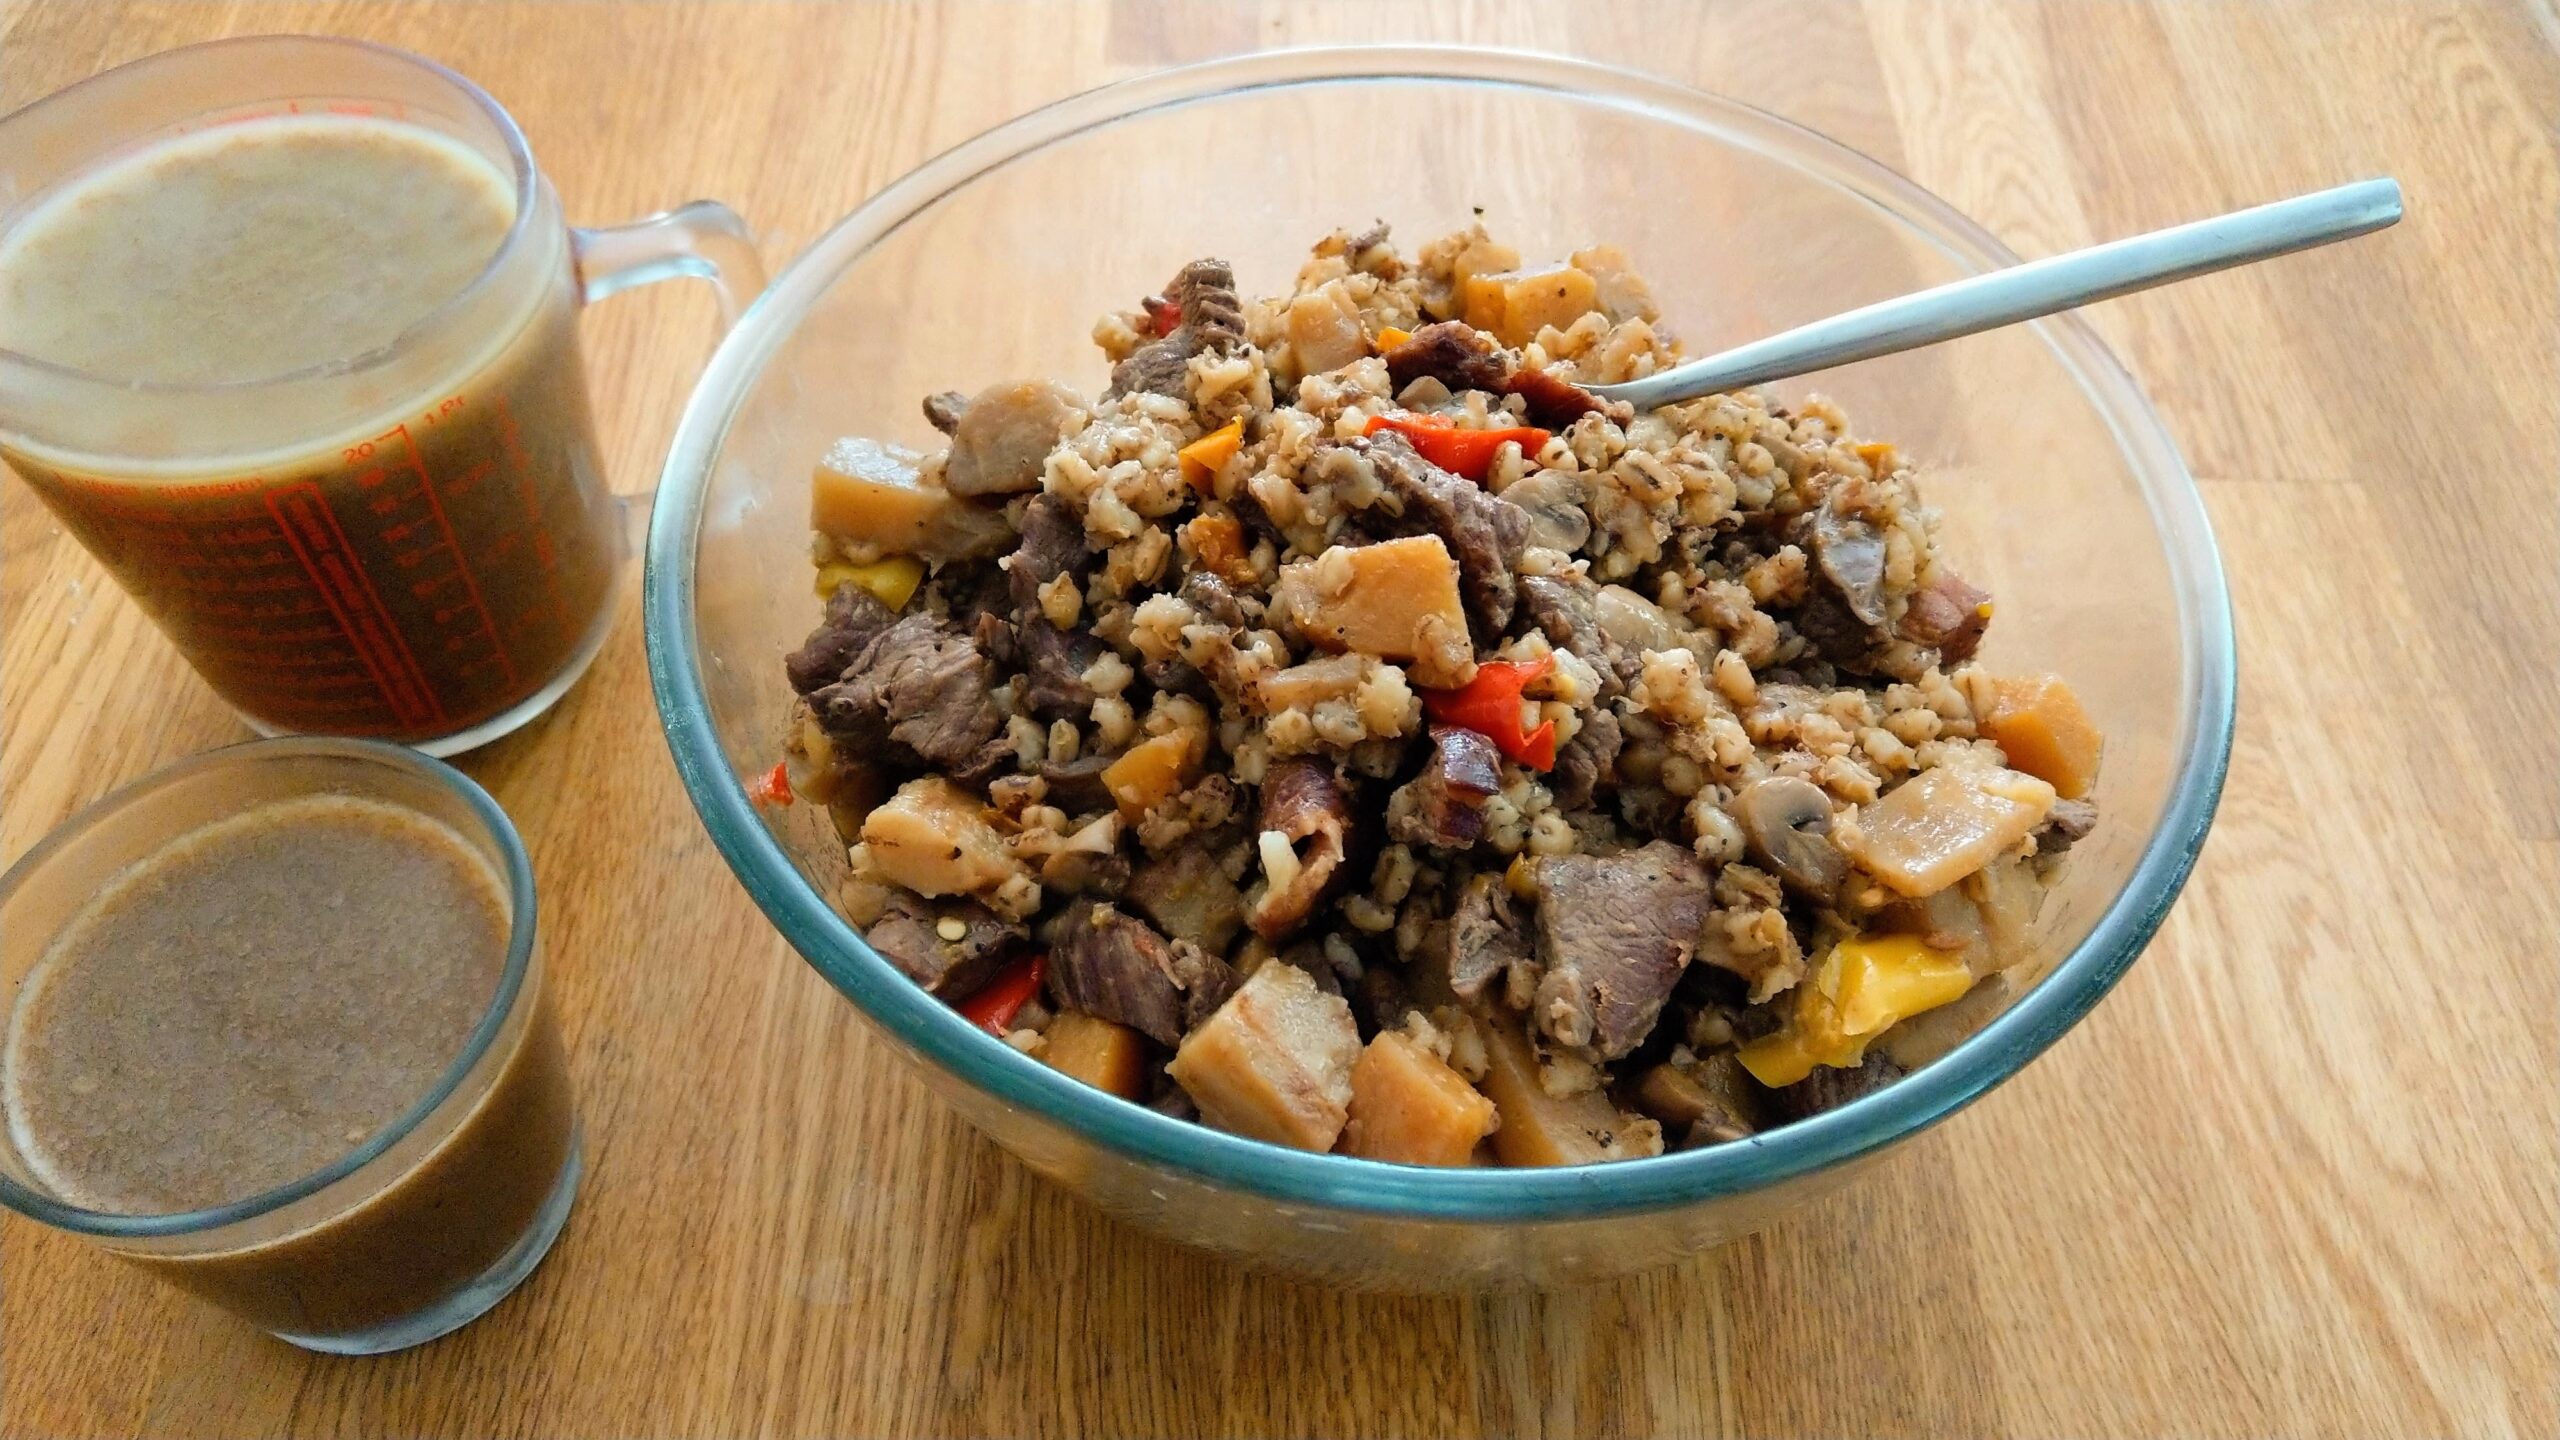
At this point normally the stock will still be thin enough that reducing it to thicken it may be a good idea. It’s your call. (We reduced ours by nearly 50% of its volume.)
And now the pastry for the pie
The pastry casing for this pie can be made using either storebought or homemade shortcrust pastry, or a “rough puff” pastry.
We went for the rough puff. For our more Realms-ish version of this, see the “Rough Puff Pastry” tab above. (That recipe is based on Gordon Ramsay’s—because who are we to argue with professionals?—and works fine even with whole wheat flour substituted for some of the white pastry flour.)
We baked the bottom half of the pie “blind,” with baking beans—which is perfectly permissible, as the pie’s bottom is going to get well soaked with the gravy anyway, not to mention flattened down by the solid contents.
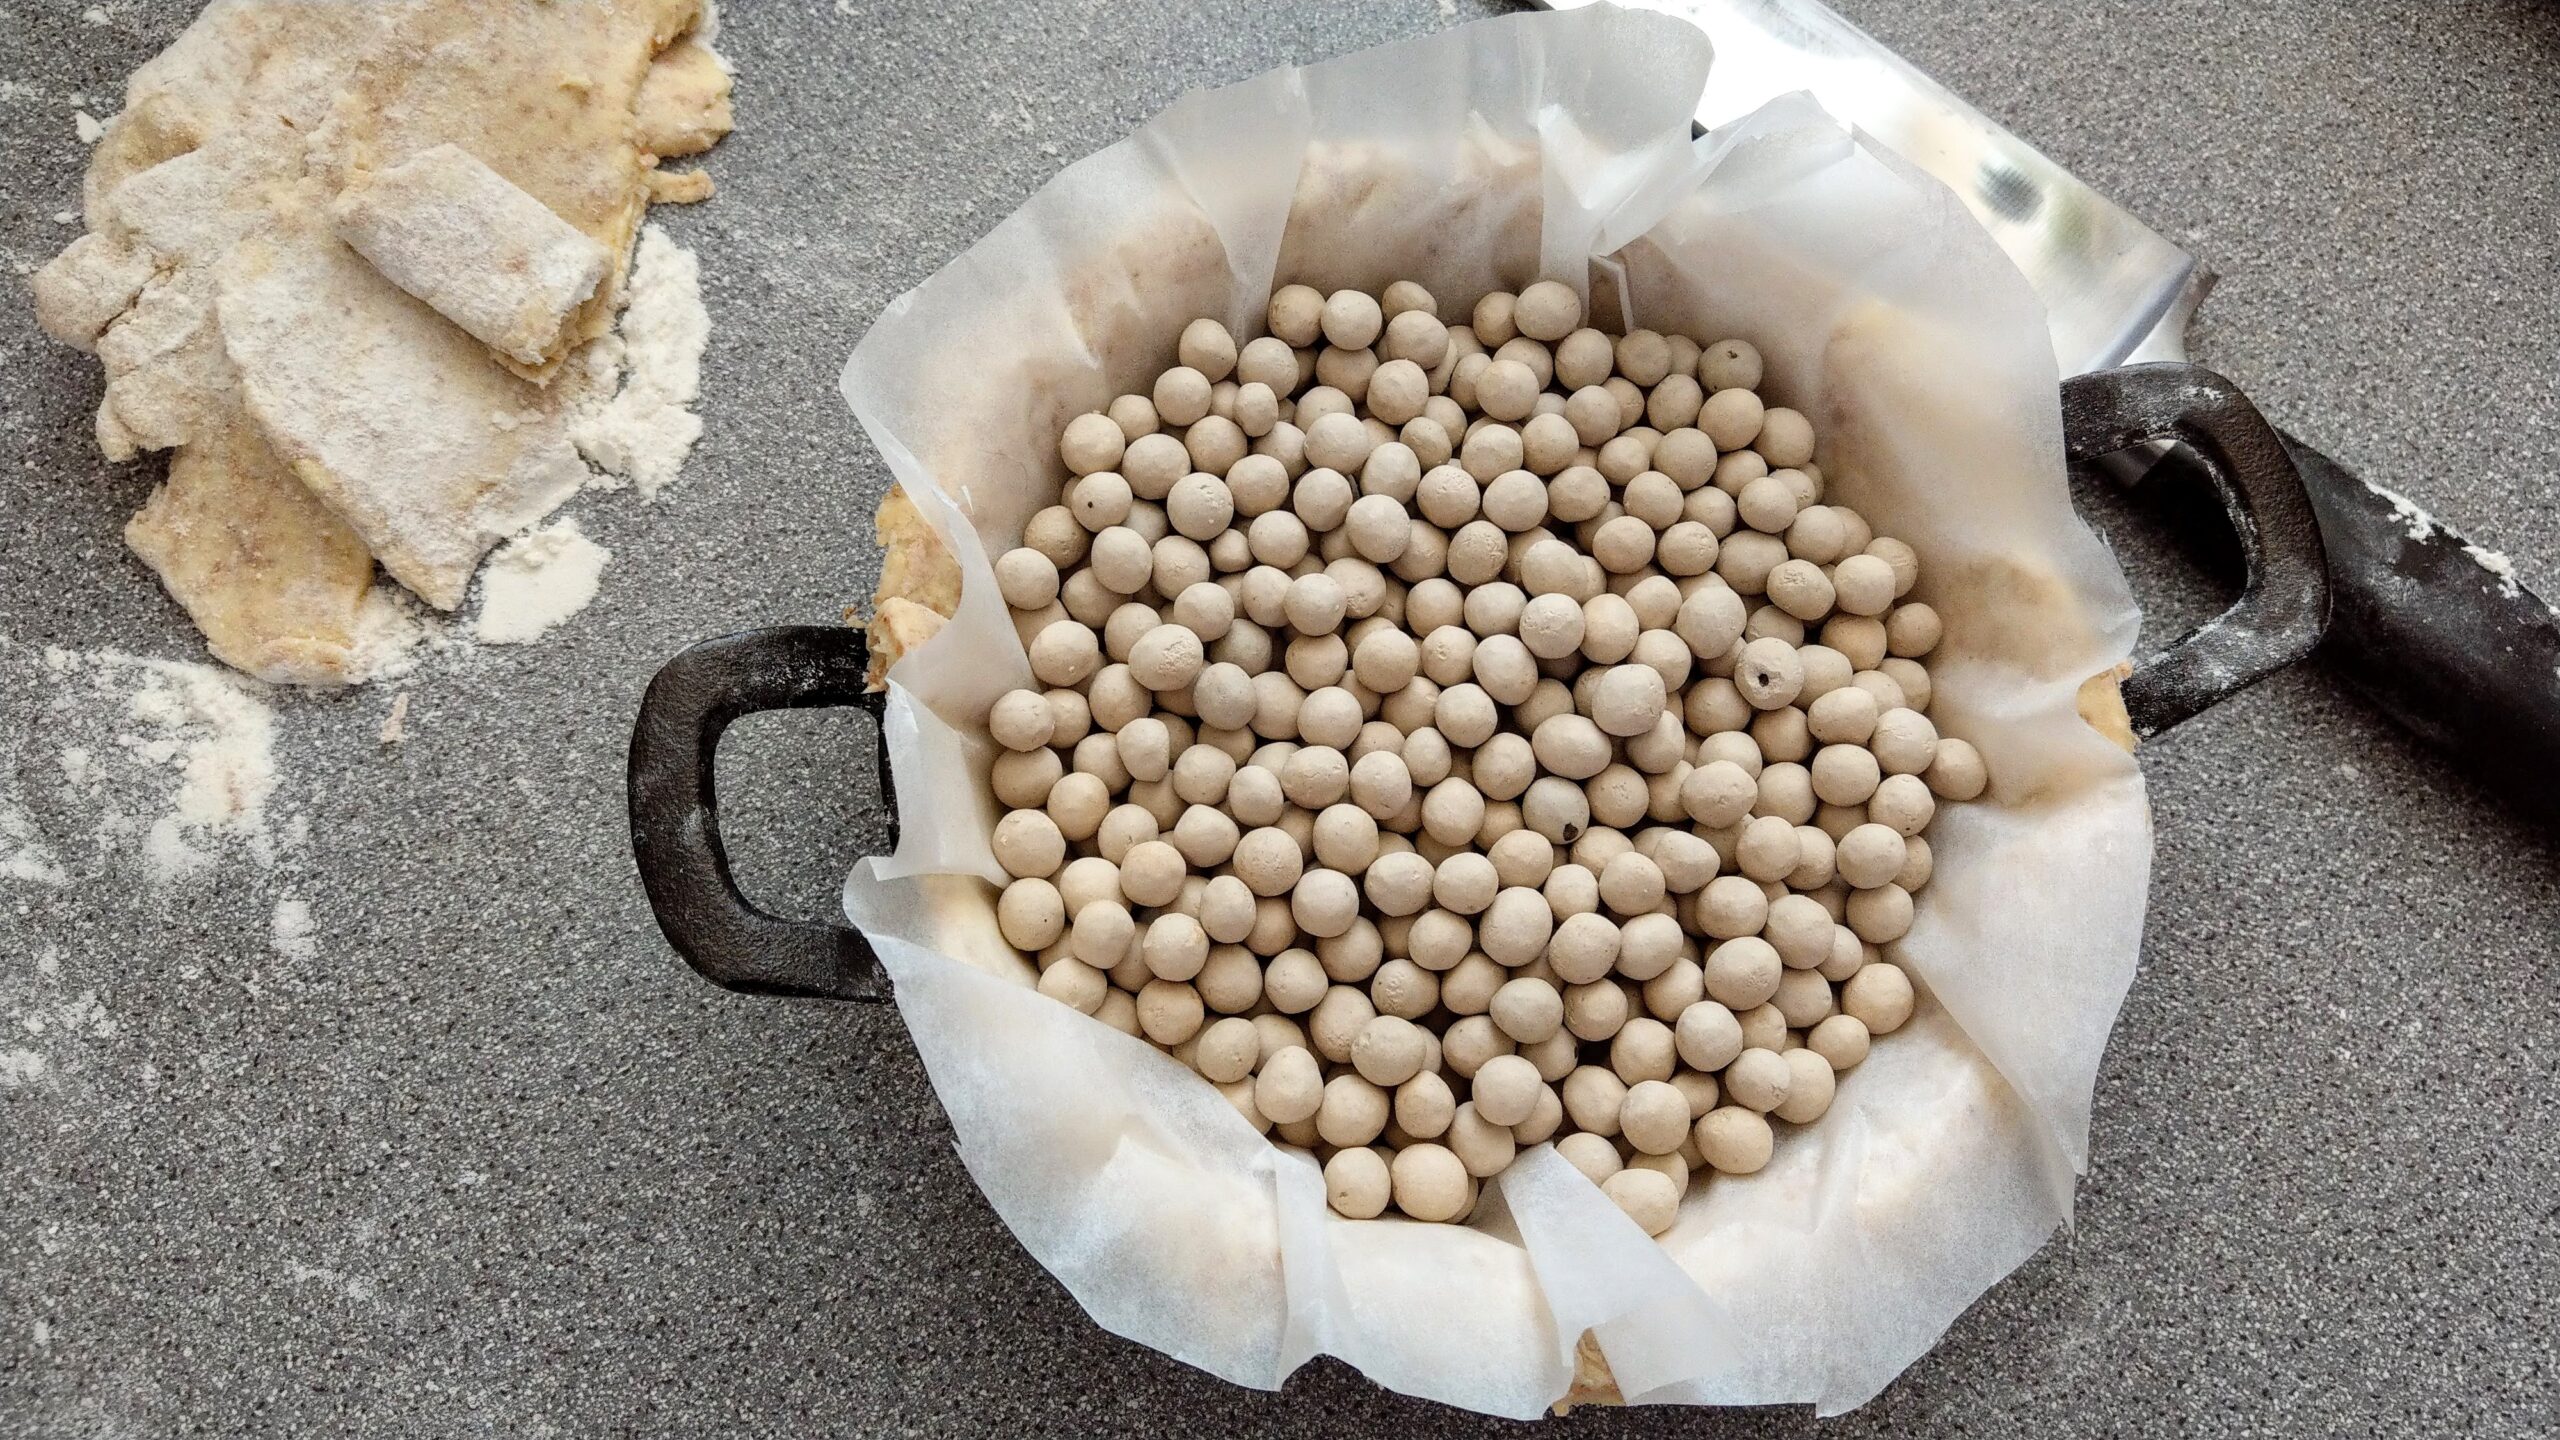
Then we used a small plate about the same size as the top circumference of the pie dish to cut out a top for the pie, and baked this on a separate baking sheet while the base and its beans were baking
Preparing the pie for serving
Heat a portion of the filling and add it to the pie dish with the baked bottom crust. Then add the baked lid and bring the pie to table. (Other images in the slideshow above show a similar pie topping, improvised with lattice-woven pastry offcuts from the first pie. Because why waste…?)
On the side, serve whatever spicy or sharp preserves or pickles you (or your guest at the meal) may prefer. Ours is shown with more of the sweet and hot pickled orange slices, and some hot-and-sweet chiles, as would be usual the approach in Steldin. (Where the complaint “This isn’t hot enough!” is as often heard in the vicinity as it is in chile-eating cultures on our own Earth.)
Enjoy!
Ingredients:
•125g plain flour (or a bread flour will work even better)
•125g of wholemeal / whole wheat flour
•250g butter—cool but not cold: it should be relatively firm
•Pinch of salt
•150ml cool-to-cold water
Method:
Mix the flour and the salt together. Cube the butter and toss it in the flour: then cut it in roughly. (You do not want the kind of fine-grained result one shoots for when cutting in butter for pie crust or similar. This pastry should show streaks when it’s rolled.)
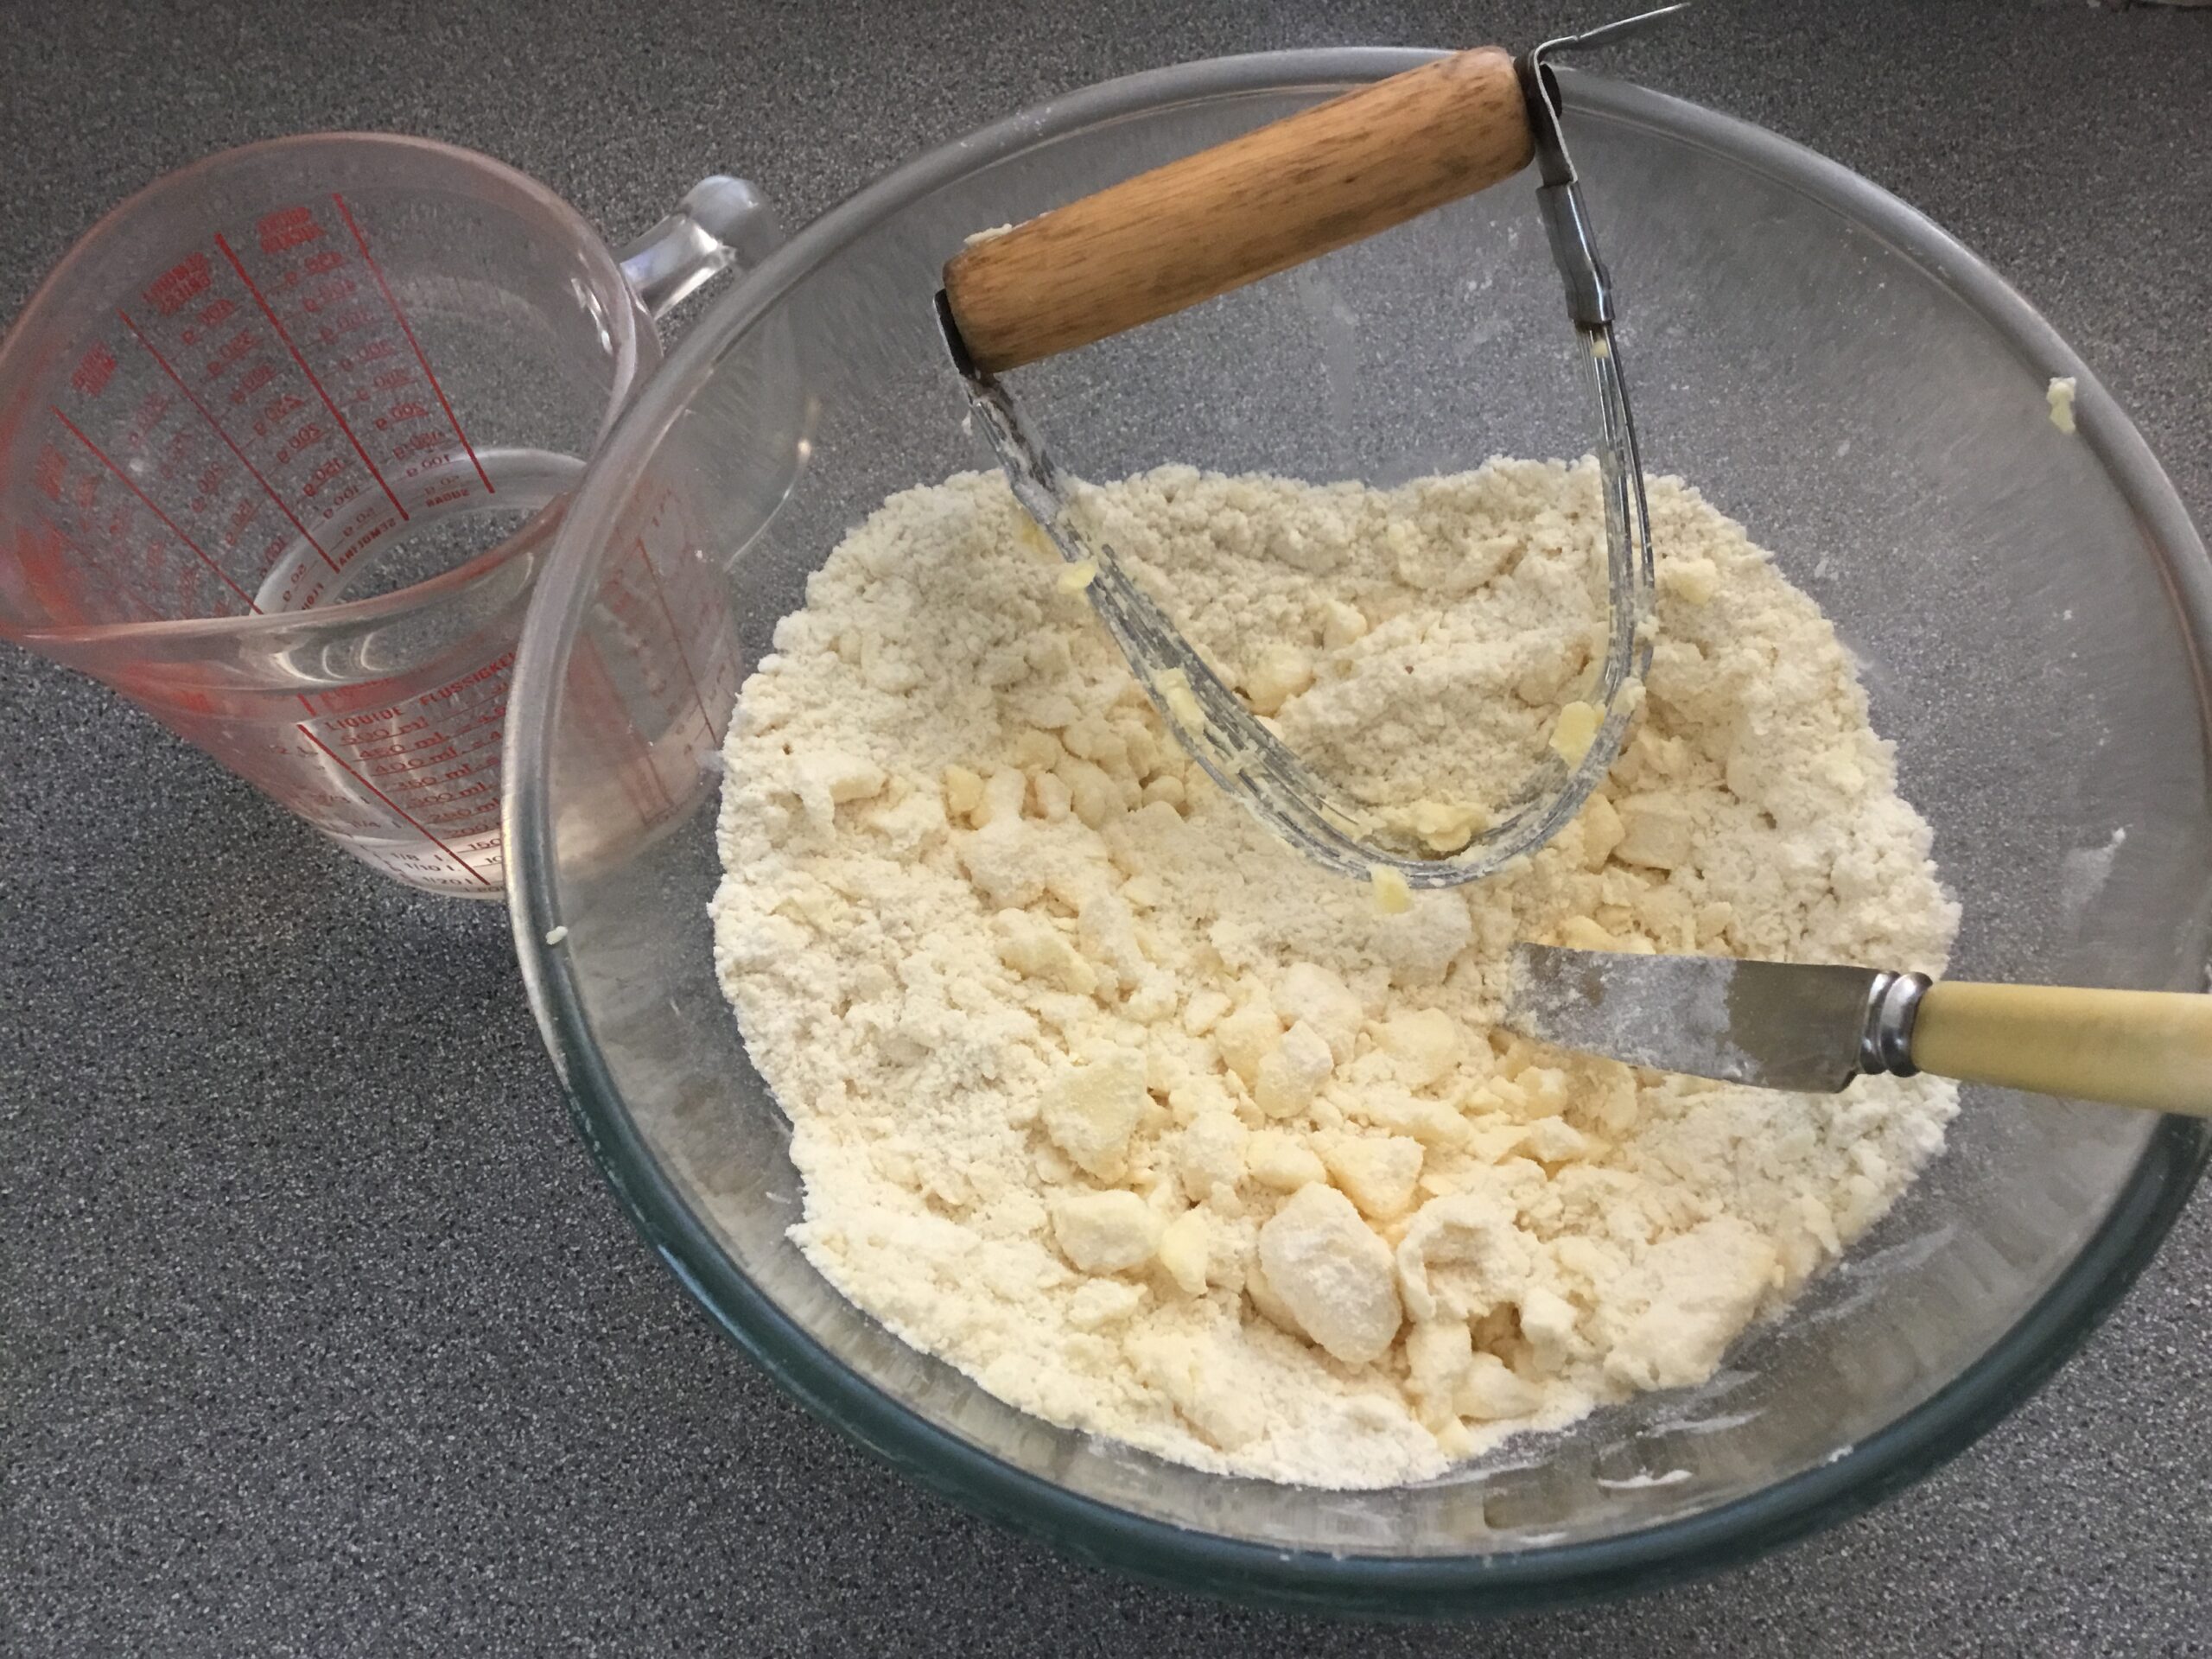
Add the water and mix it gently all together until everything gathers. If your flour’s being abnormally absorptive on the day you’re making this, add a very little more water if you have to in order to get everything to come together.
Cover the dough with a cloth, or plastic wrap if you prefer, and put it in the fridge to rest for about half an hour.
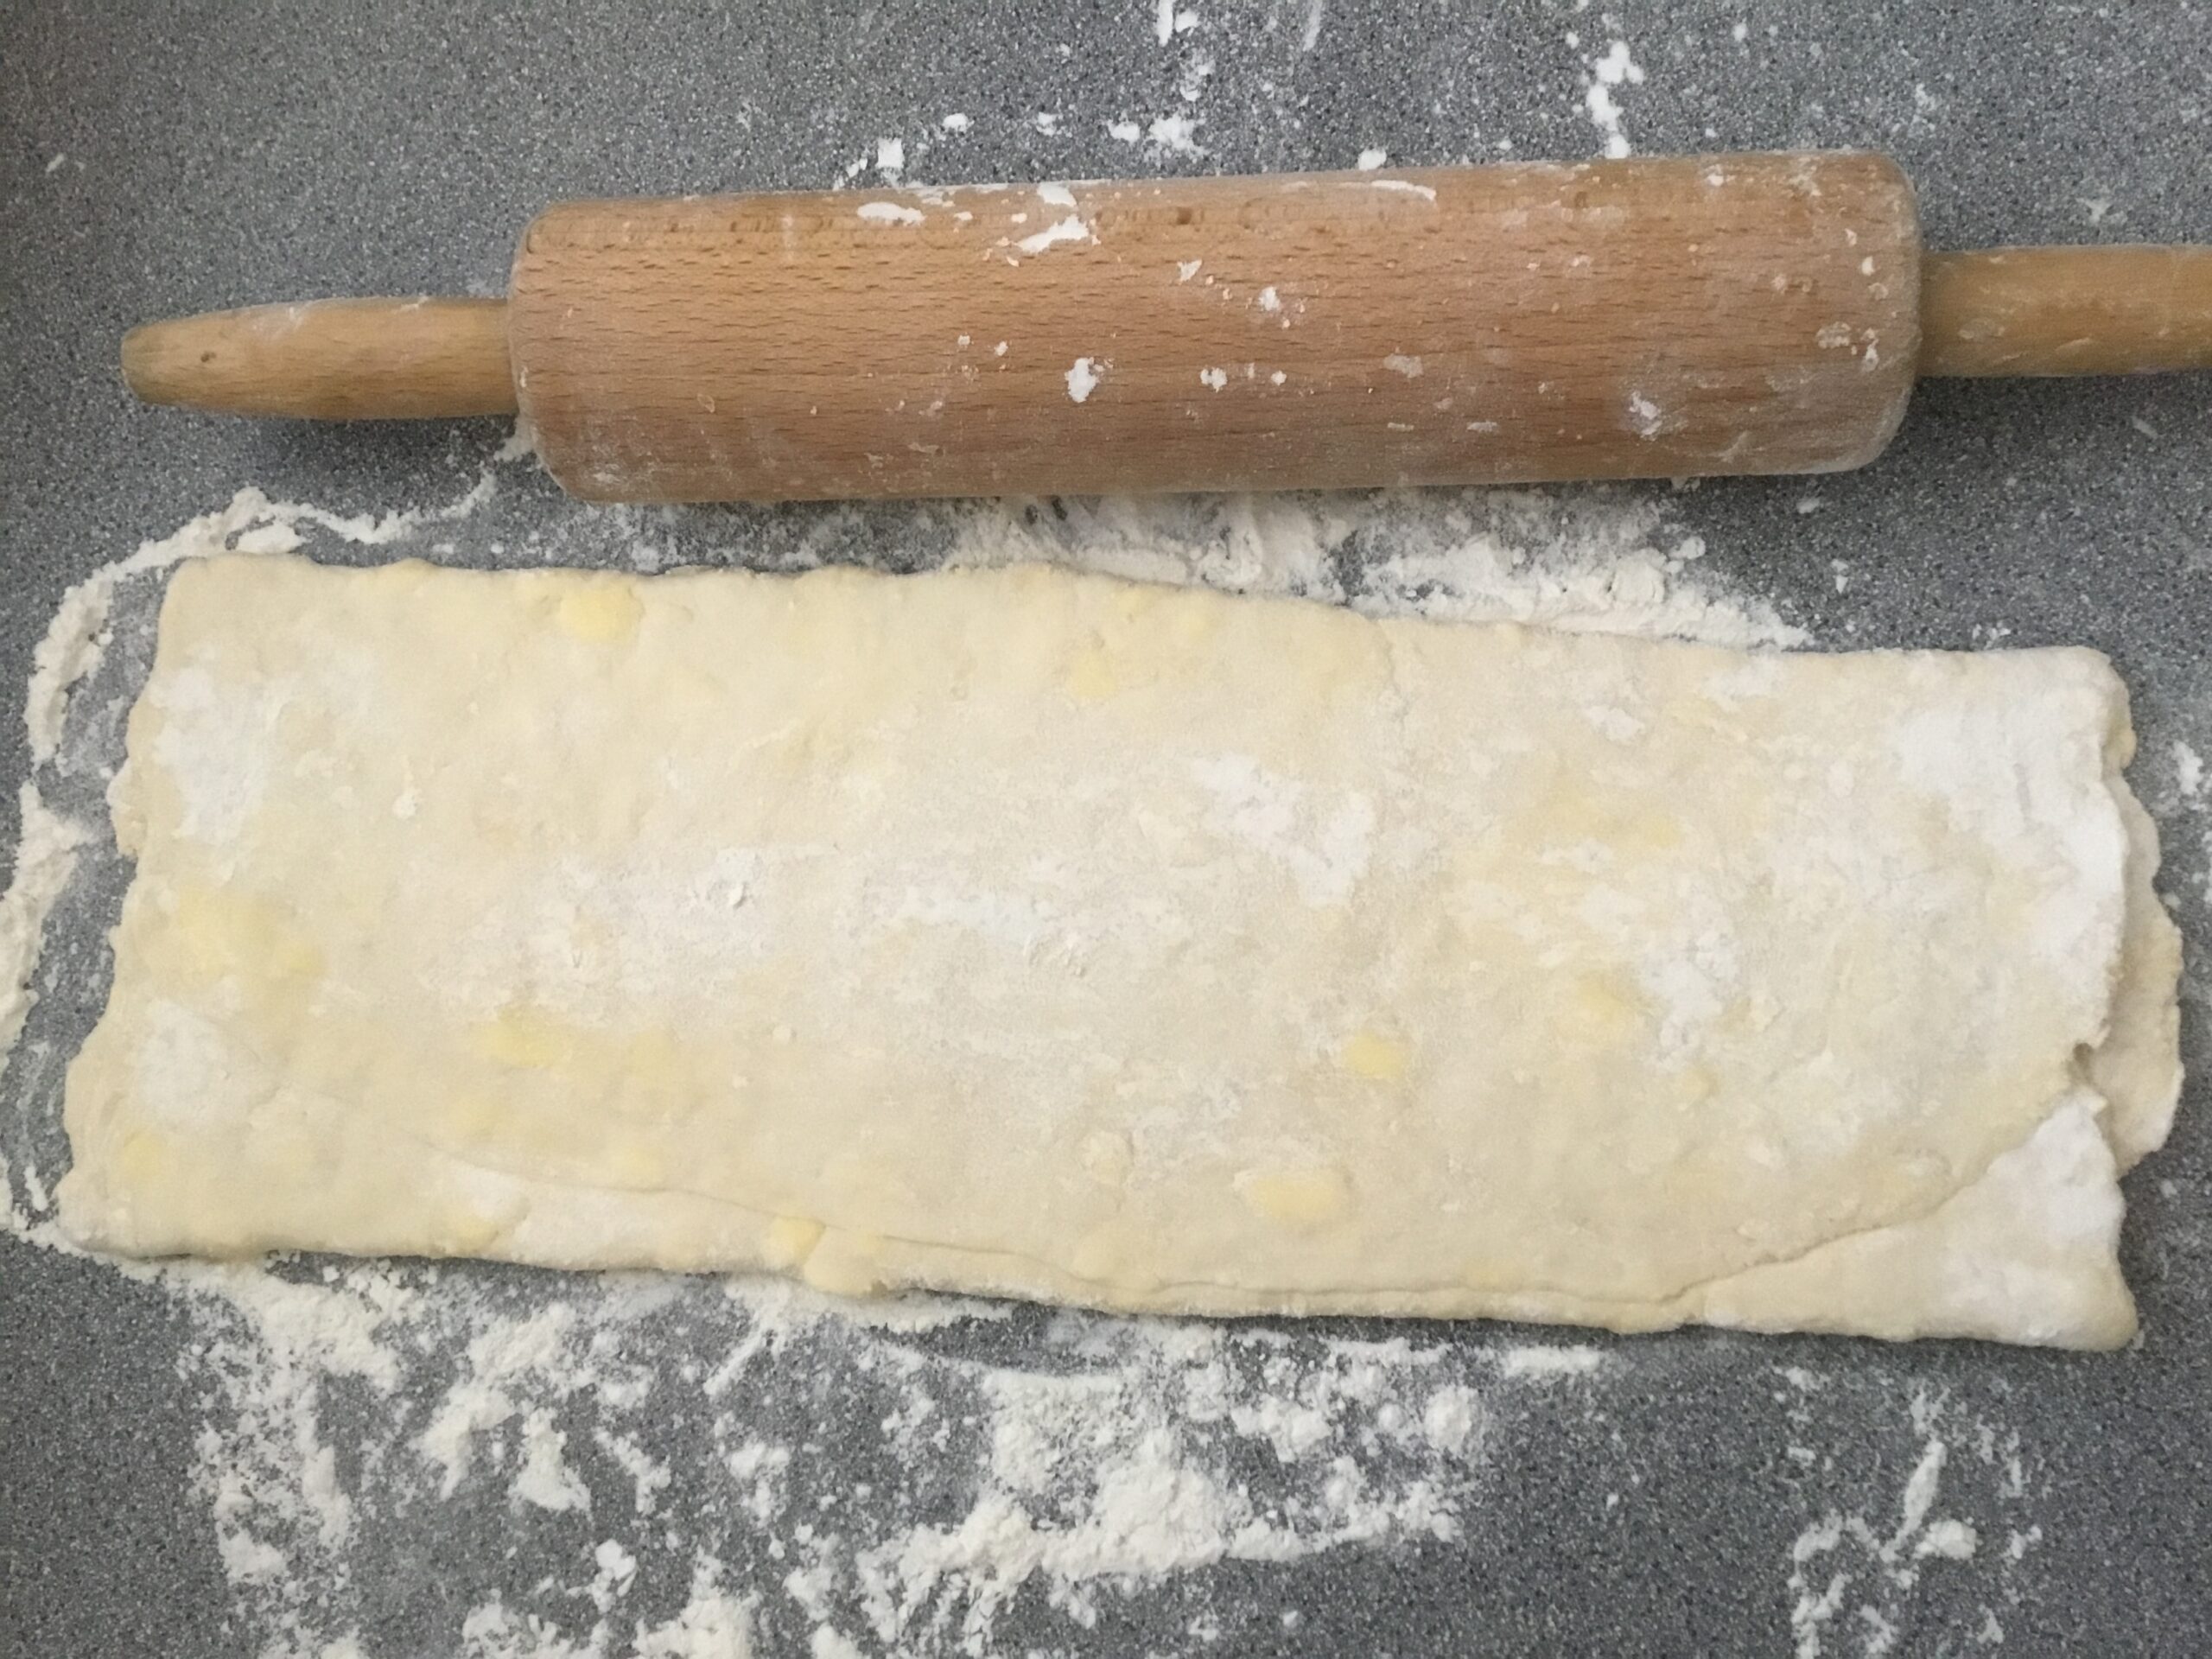
When this time has gone by: Lightly flour a work surface, turn the dough out onto it, and knead it very gently for just a few minutes until it smooths out. Shape it into a rough-ish rectangle.

Roll it gently in just one direction until it’s between two and three times as long as it’s wide.
Fold one third of it over the middle of the rolled-out part.
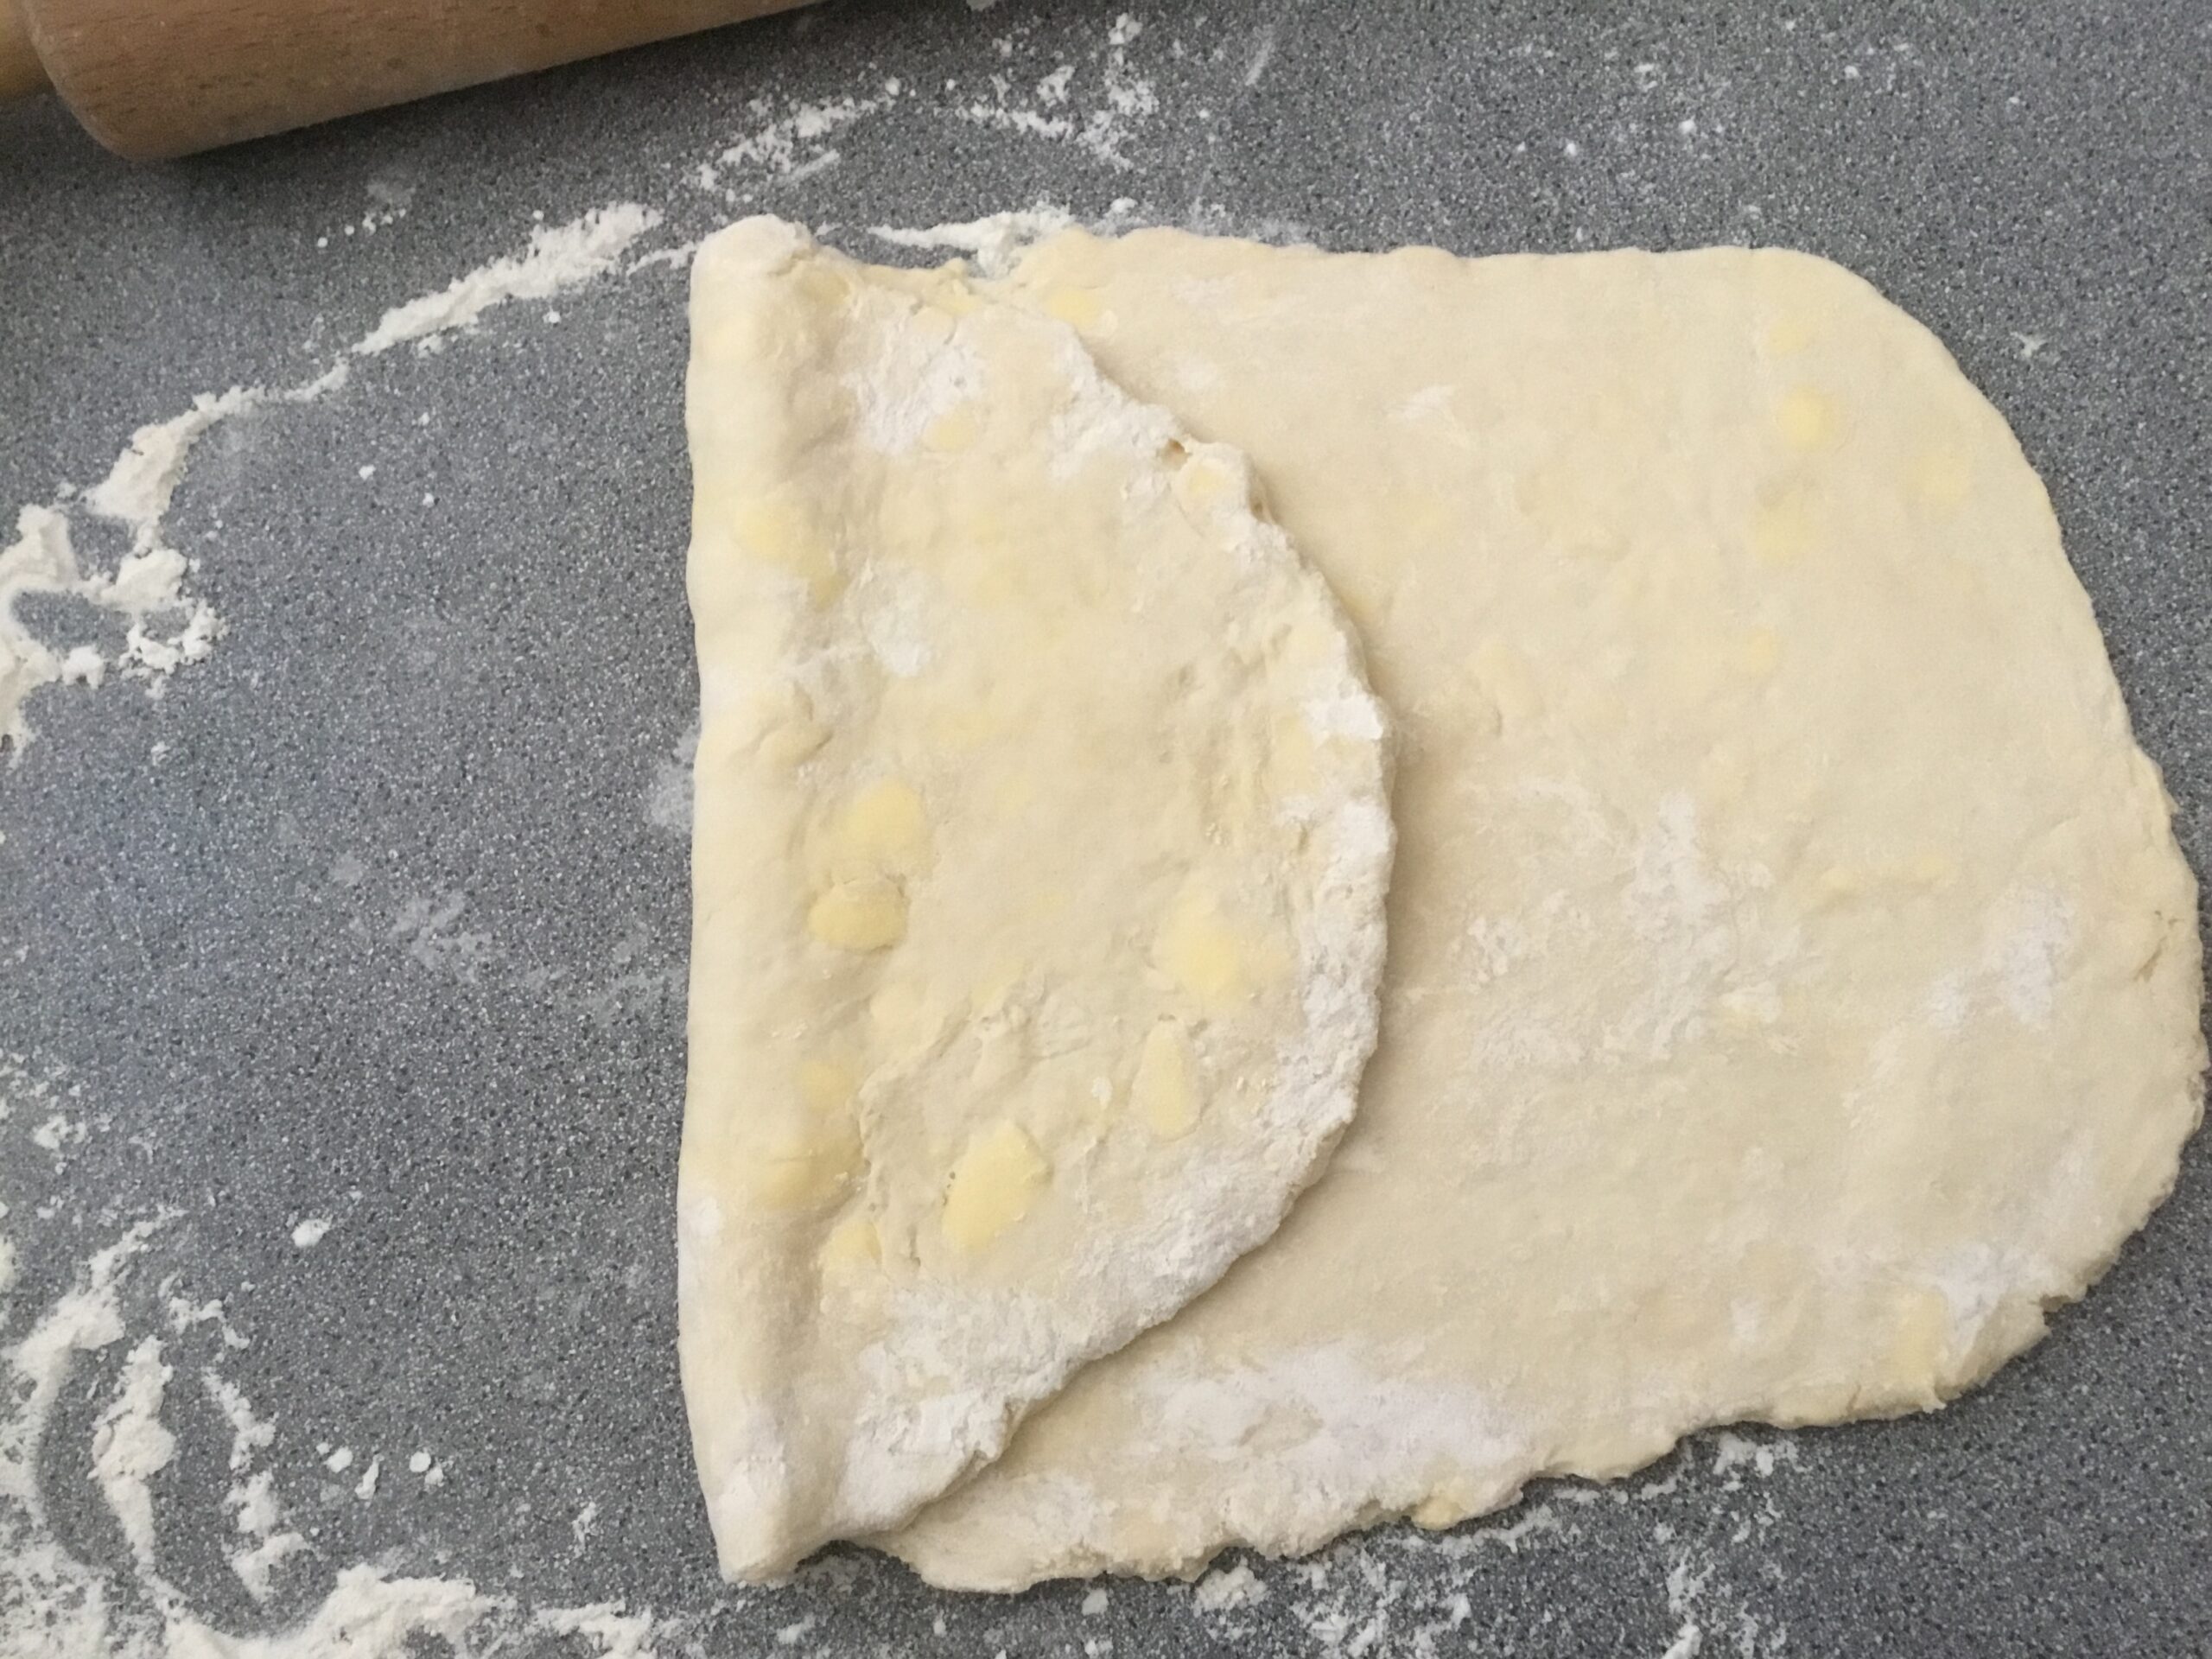
Fold the other third on top of the first one.
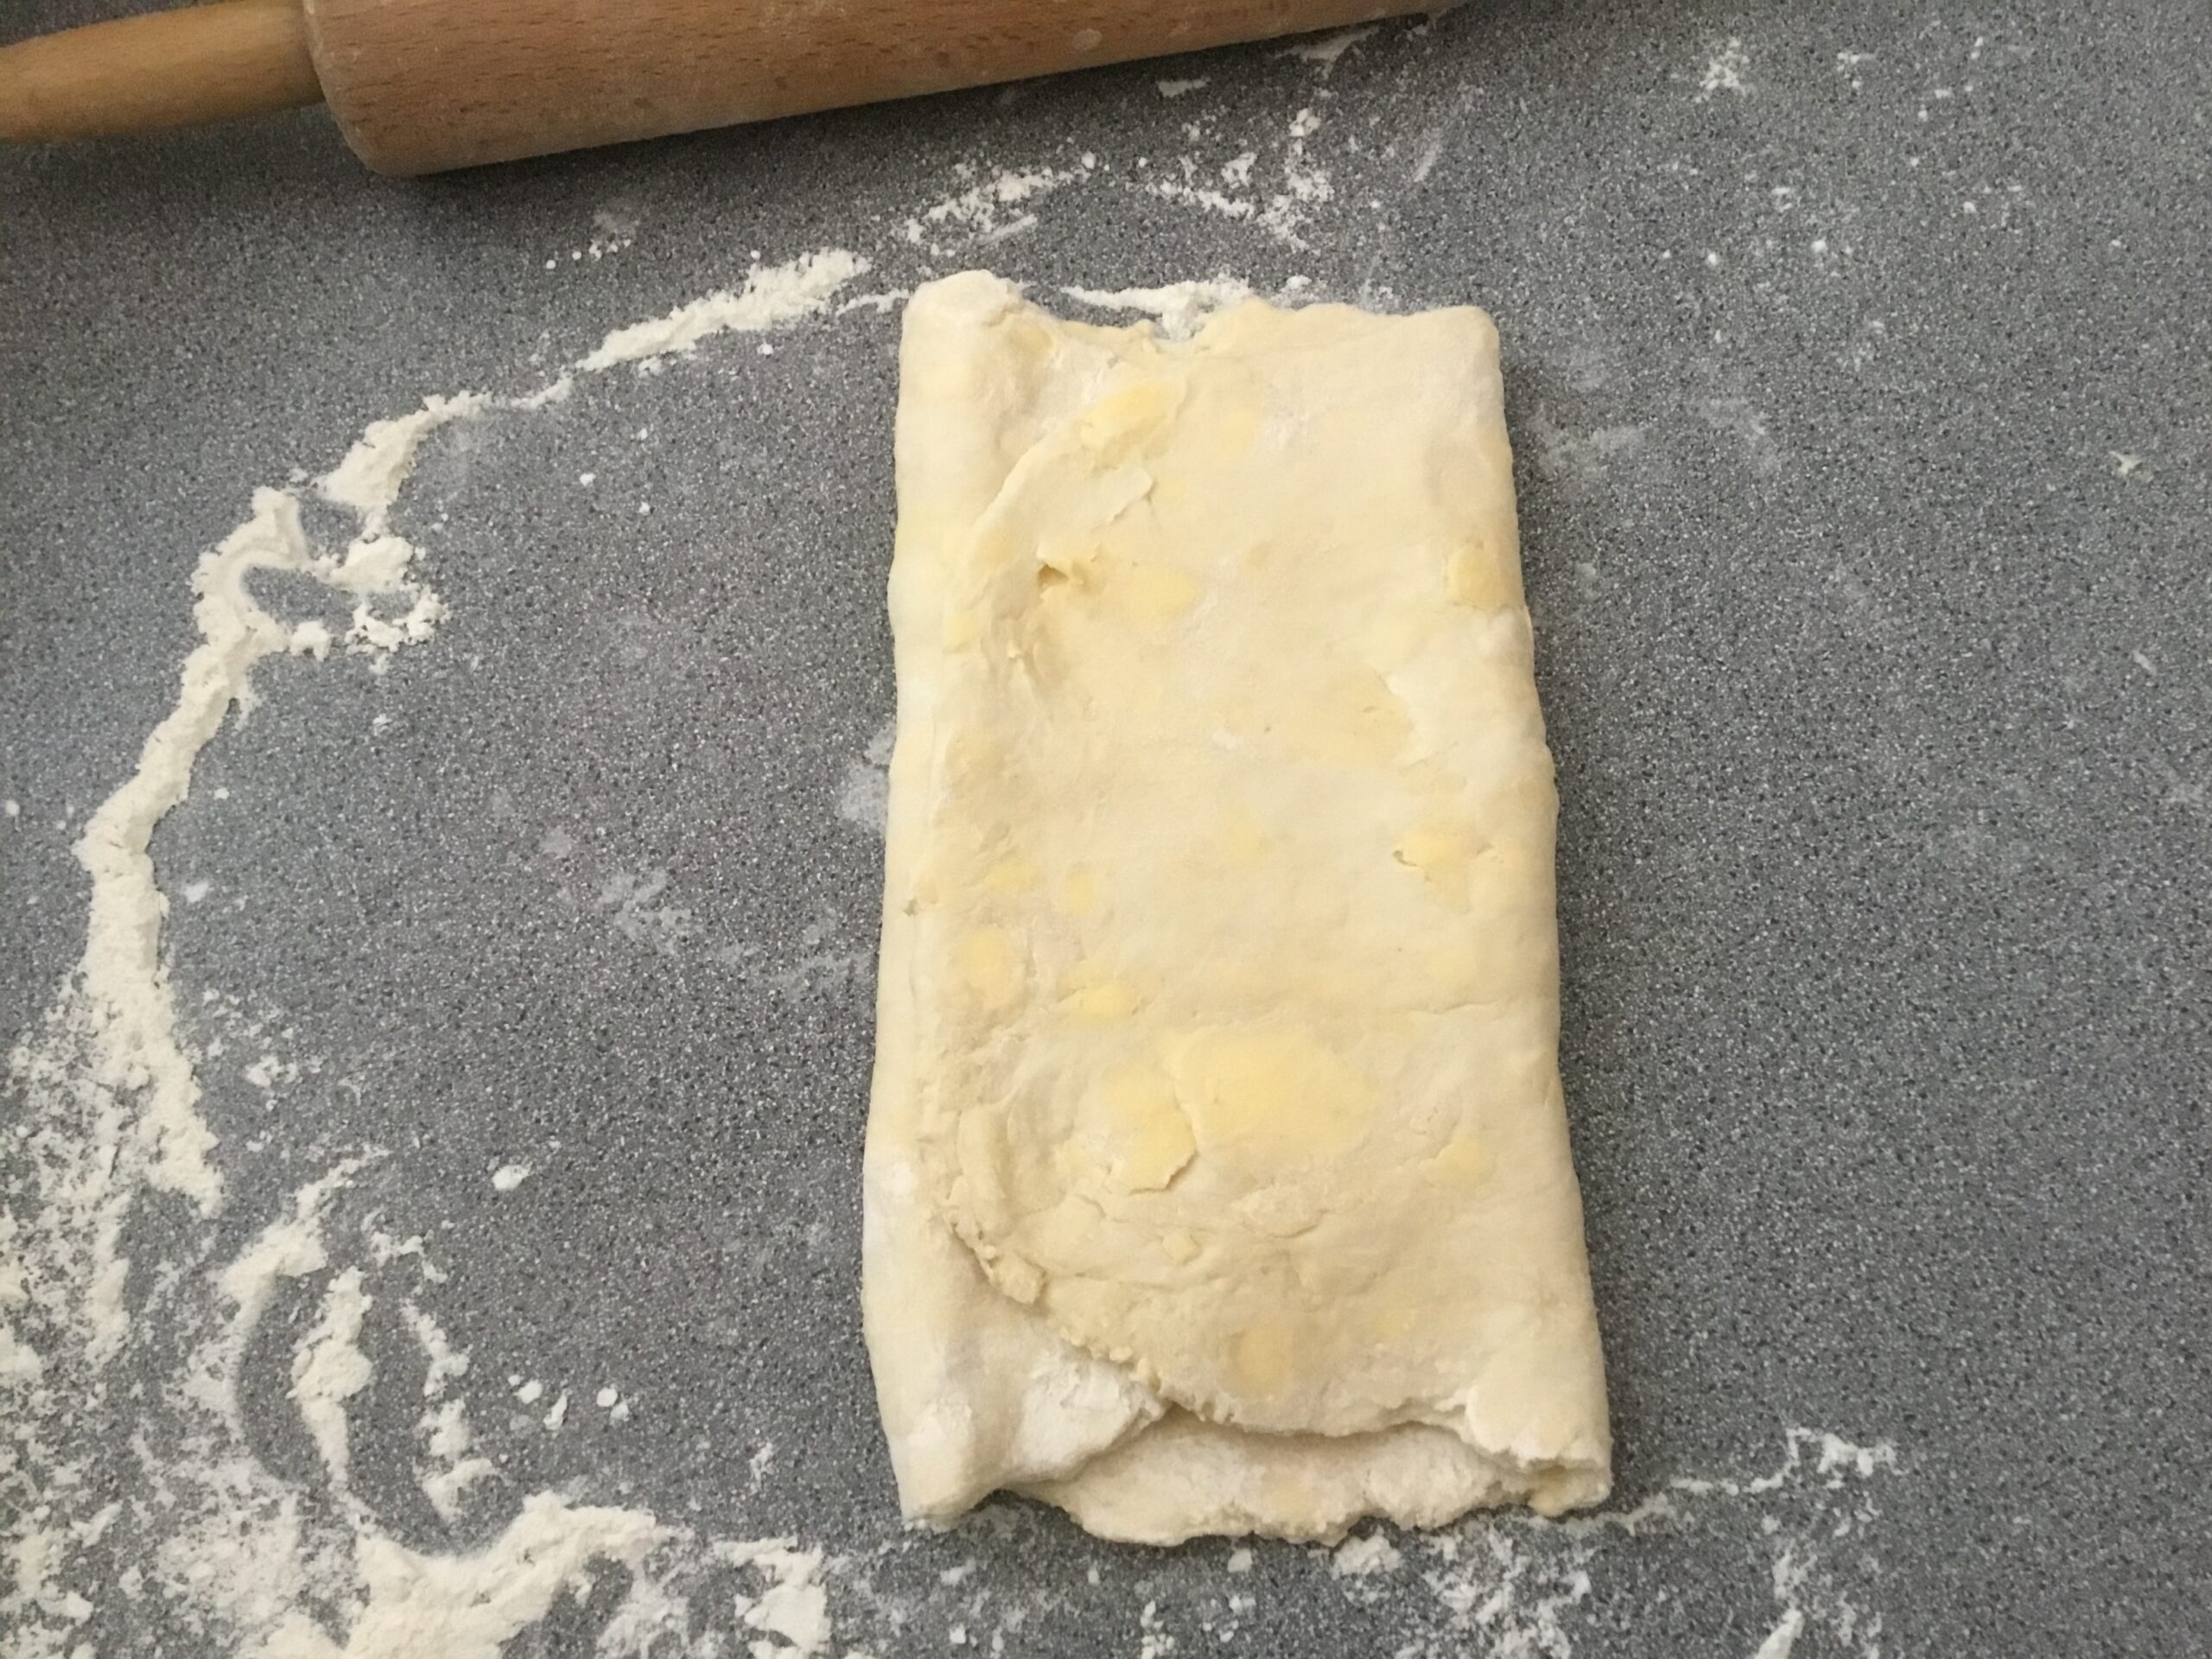
Turn it at a 90-degree angle and roll it just a bit more to smoosh the layers together.
Fold one-third of this business up over the middle again.
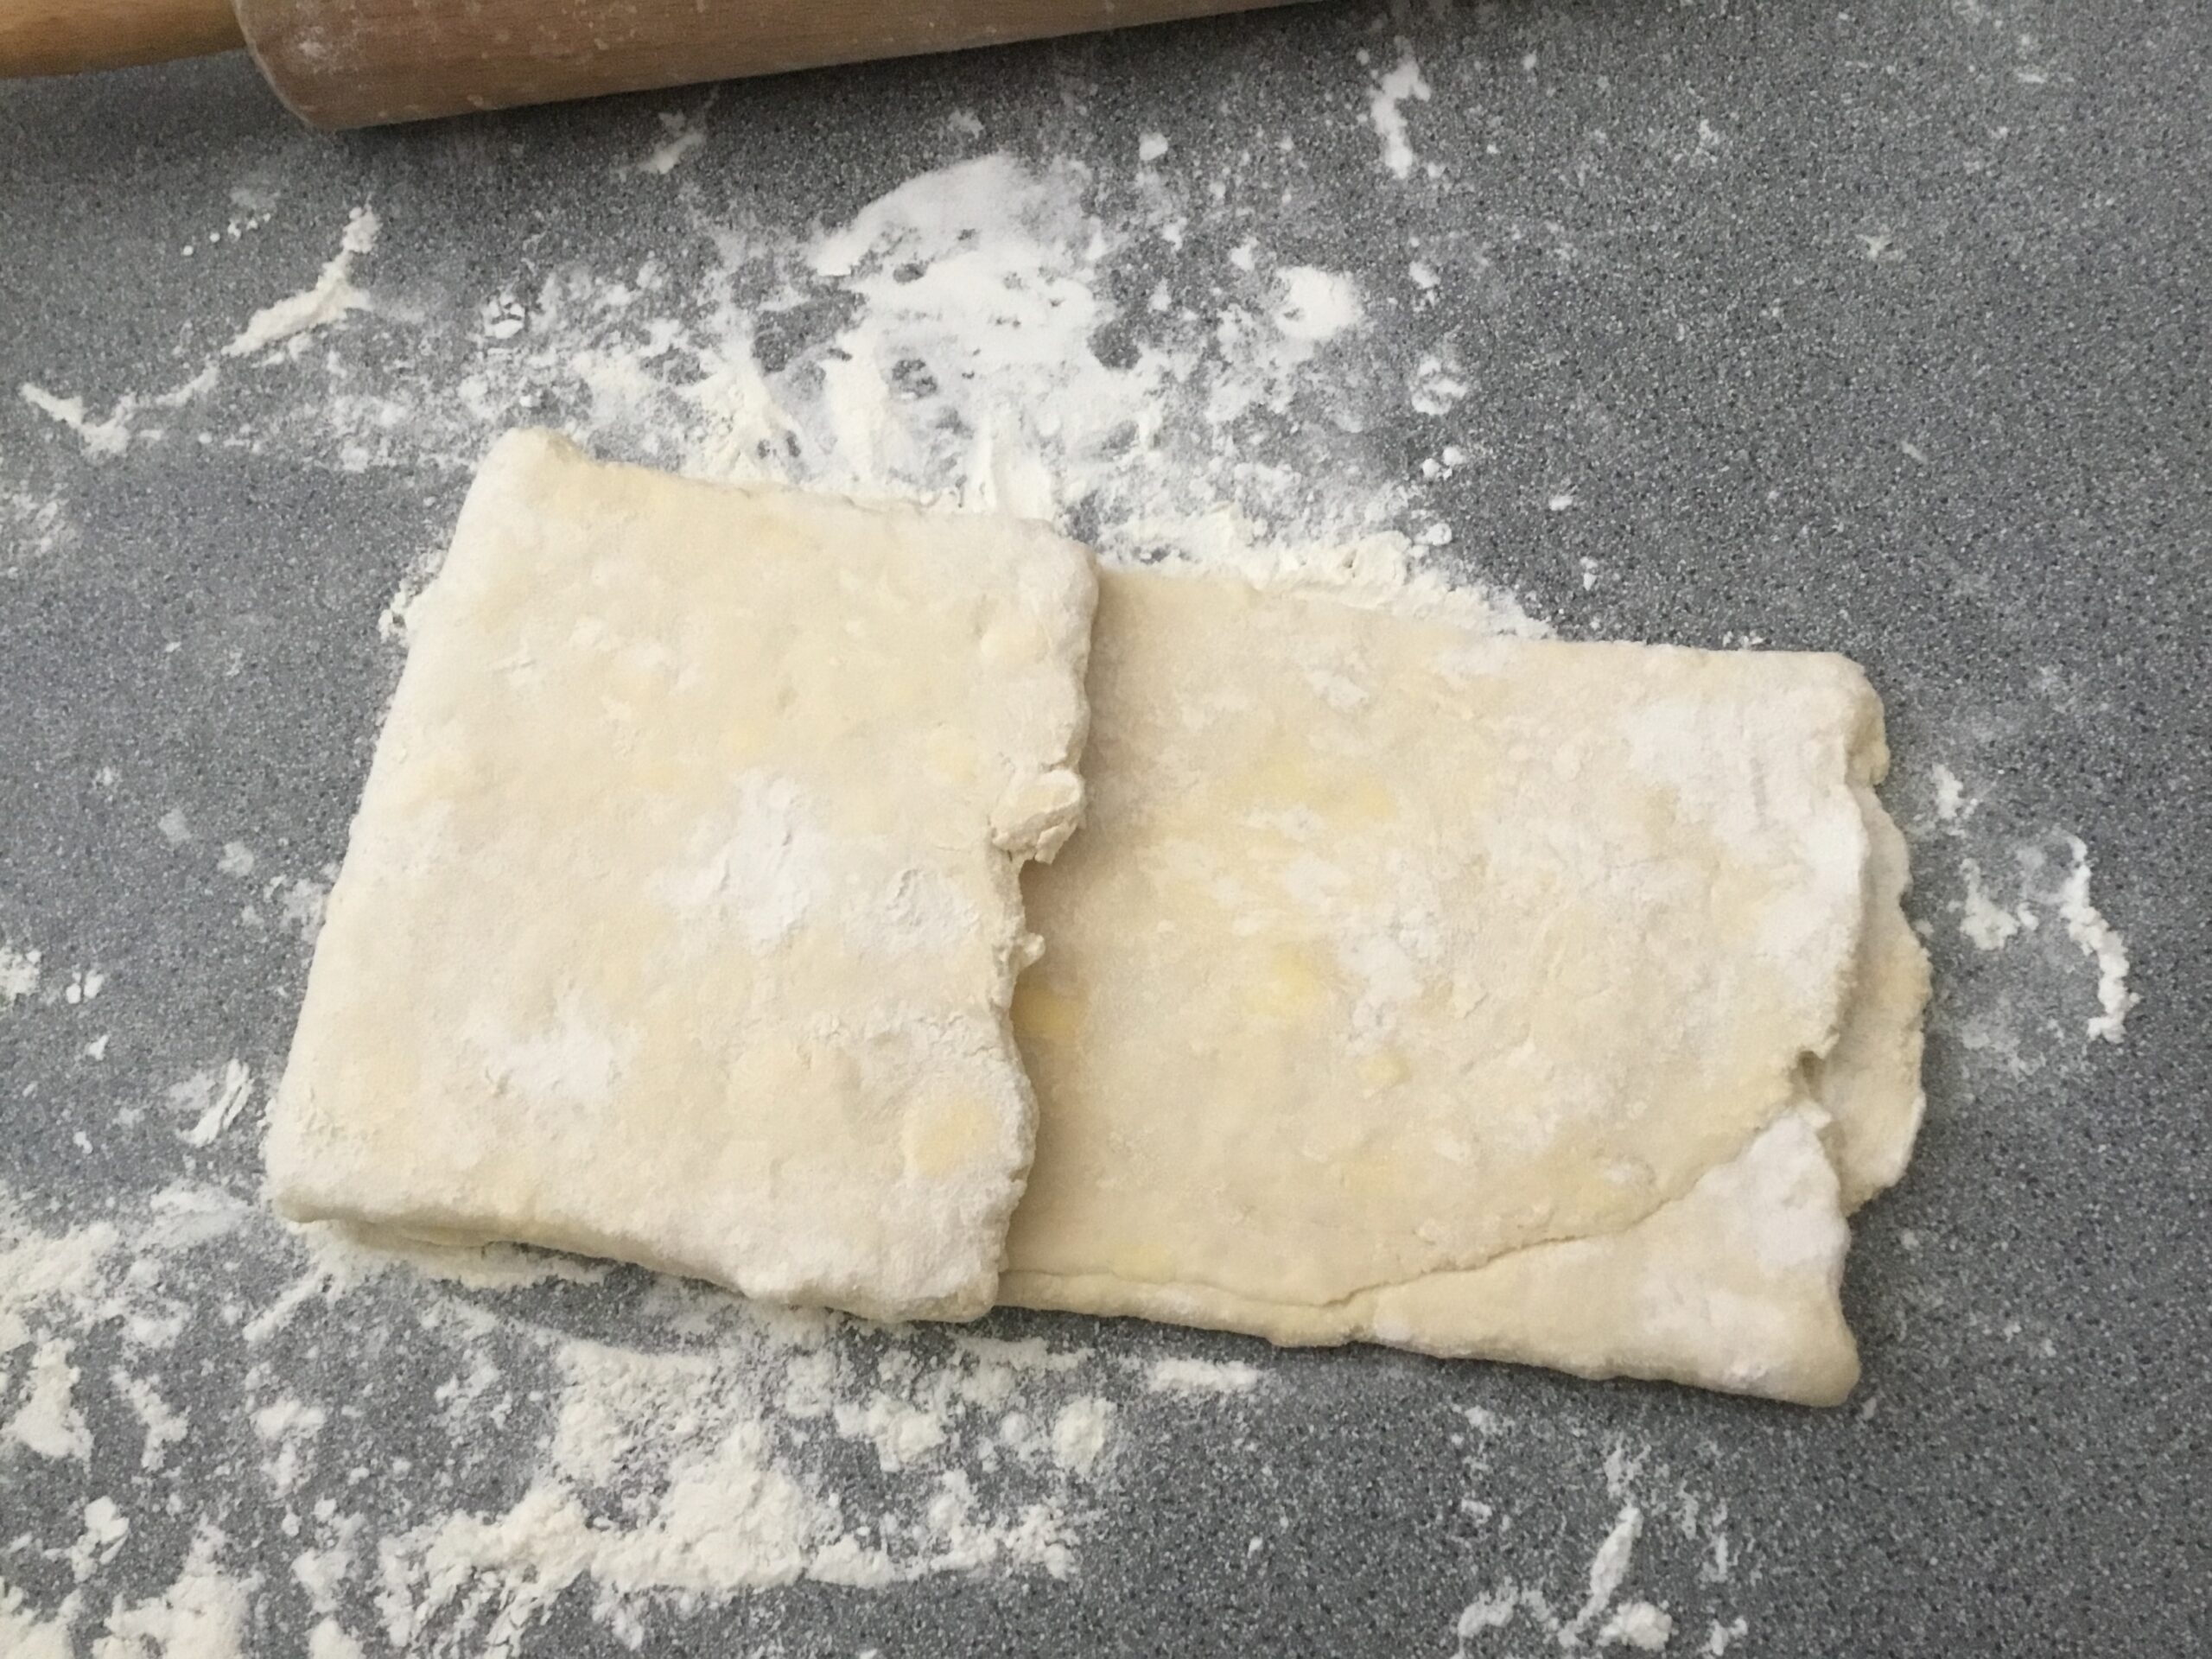
Fold the other third on top of it.
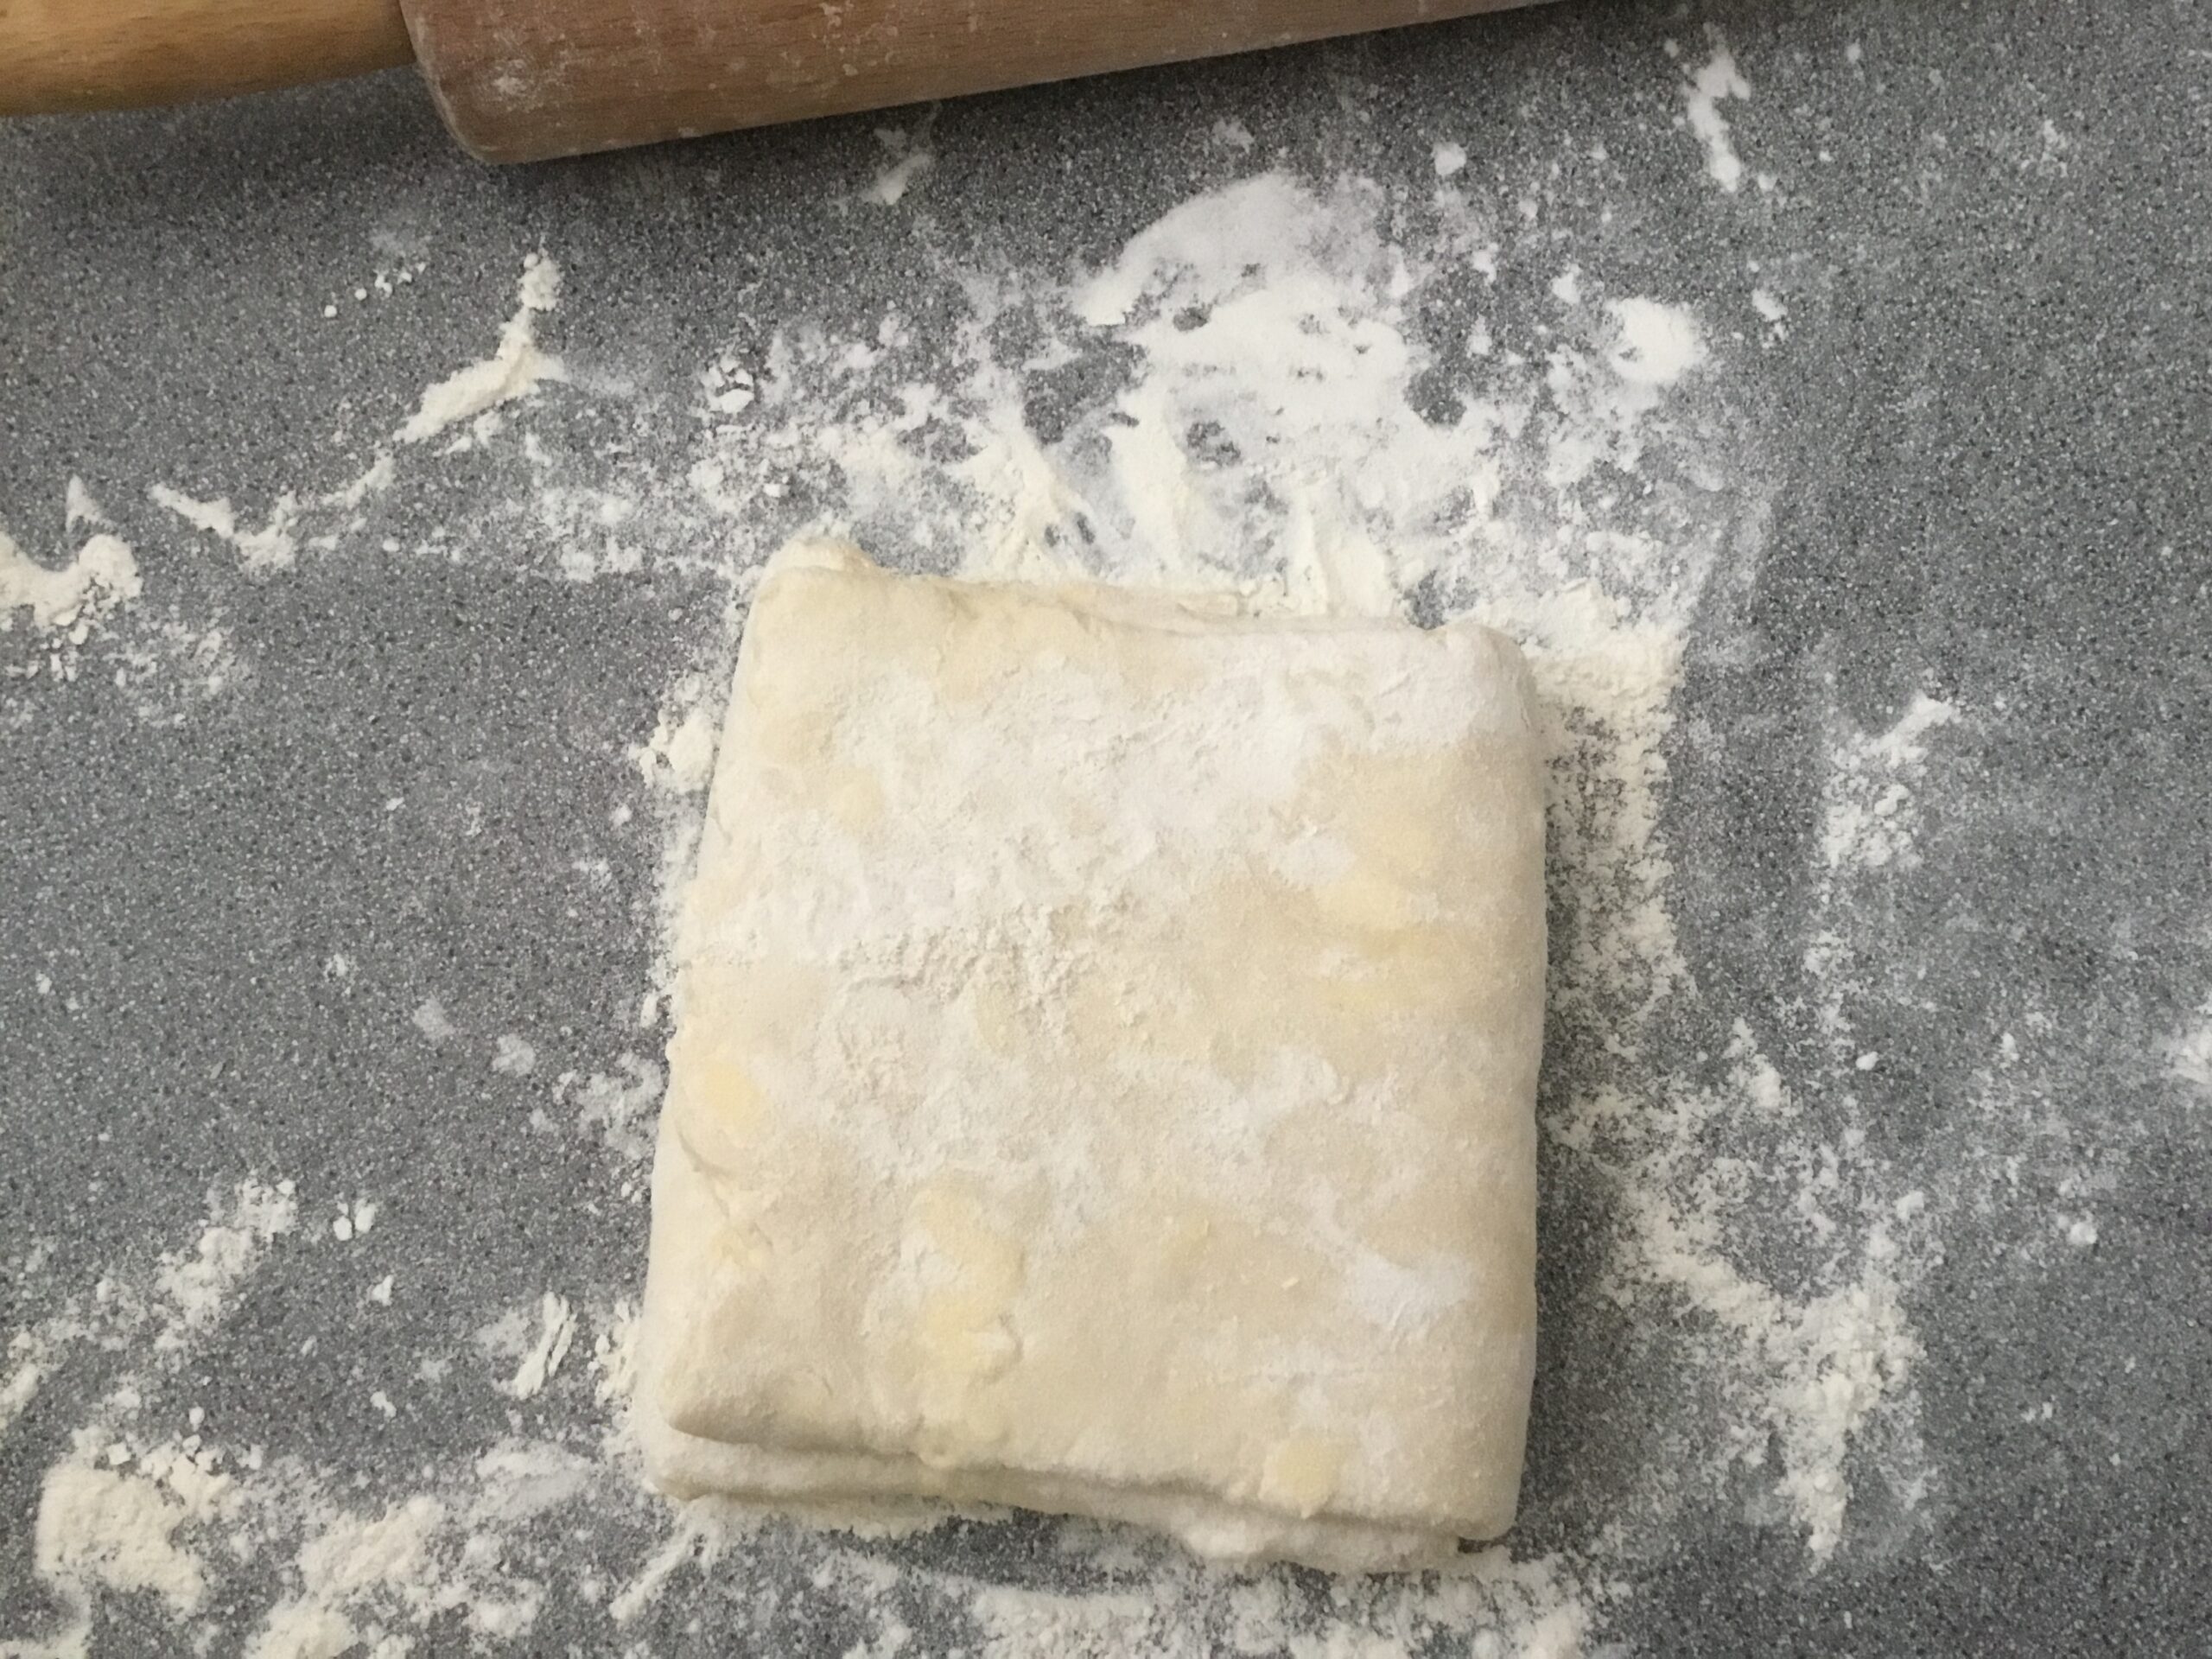
When that’s done, stick it in the fridge for another half hour or so. It will then be ready for rolling out and lining a pastry dish.
The name from the cooking style comes from some of its earliest manifestations, used to cook food slowly and save fuel or the use of other power sources to provide heat. Other names for it include “residual-heat cooking“, “thermal cooking”, “fireless cooking”, “Sunday cooking” (for those observing a tradition that forbids work on Sundays), and “passive cooking.”
These early versions of the more modern-day slow cooker involved sturdy wooden boxes well stuffed with hay. The hay would trap tiny pockets of air, which turned its mass into an extremely efficient insulator. A pot of food heated to the boil would then be packed into this box, and the box sealed up. Then, after a cooking period partially determined by what kind of food you were cooking, the box would be opened and the fully cooked food—still hot—would be removed for serving.
The advantage of this cooking style over the slow cooker is straightforward. The slow cooker continues to require electricity, even if it’s only a small amount, to do its work. The hay box, though, being far more effectively insulated, needs no more electricity at all. It simply conserves inside the food-and-cookpot system the energy you’ve already put into it, so that it remains available to keep working on the food.
While there are commercially-made items that exploit the residual-heat method of cooking—such as the Wonderbag—it’s easy to make a perfectly effective one from scratch, using materials you may have lying around. You need:
- •A box that can be sealed closed (taped shut, folded, or whatever works for you)
- •Material that traps air inside it for insulating purposes (blankets, old pillows, etc)
- •A heavy cooking pot with a lid, capable of fitting inside the box
- •More insulating material to put on top
Whatever insulating material you use should be capable of being protected from the hot pot (if necessary), so that nothing melts on contact with it.
Here’s how Peter made ours.
While we were on lockdown, we got in the habit of ordering a lot of food and similar supplies online; these would be delivered by courier, or in the mail.
One of our favorite sources was the Irish online butcher, James Whelan‘s.* One delivery came inside this big box…
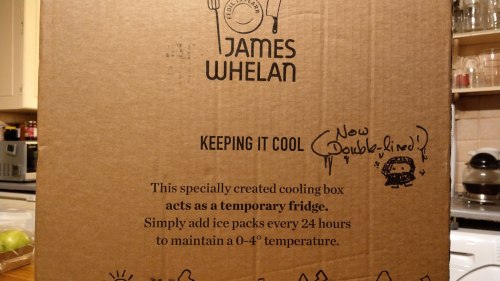
…which was internally insulated with thick styrofoam sheets on all sides.
We took one look at it and realized what else it would be perfect for besides keeping food cold. So a month or so after that, when we ordered from Whelan’s again, and the same kind of box arrived, Peter pulled out its styrofoam and cut it down to fit inside the insulation that came with the first one. (Hence the cartoon about the double insulation.) He then shoved some more cut-down styrofoam into the bottom of it, and an ancient beat-up pillow. The hot pots sit on top of that.
 When the hot pot goes in, it gets another pillow wrapped around it, a third pillow on top of it, and finally another of the original sheets of styrofoam, to seal the top of the box.

And then the box is sealed, and you walk away to do other things for the next twelve hours. (Or longer. The delightful upside to this approach is that it’s impossible for food to burn because you left it cooking too long.)
The only other useful tips I can think of when you’re cooking using this method would be:
- •Make sure the pot you’re using is the heaviest you’ve got (in terms of material: cast iron, for example, rather than thin steel) that will fit in the box.
- •Make sure that the pot you’re using is also as full as practicable. The fuller the pot is, the more heat it will contribute to the sealed energy system of which it’s about to become a part.
- •And finally: make sure the food and pot have boiled (or at very least simmered pretty hard) on the stove for at least 15-20 minutes before you put them in the box. The (ideally) cast iron of the pot must also be given its chance to store as much heat as possible.
When you’re ready eight to twelve hours later): open the box, remove the pot, and check your dish for doneness.
That’s all there is to it!
Recommended for your attention, if you’re interested in investigating this topic further:
The online version of the 1913 Fireless Cook Book by Margaret Johnes Mitchell, which contains both in structions on how to build a hay box as well as 250 recipes. You can browse this as a web page, or download it as an ebook.
*Whom we recommend unreservedly for the quality of their meat as well as for their packing materials. 🙂
Beef, vegetables, alcohol, beer
Slated, Olympia cast iron, Zassenhaus, Pera Peris